
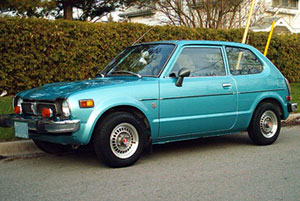


Restoration: 1978 Honda Civic (1200) Part 2
Repairing the rust holes and lots of welding.
-
Randy

- Administrator

- Posts: 1450
- Joined: April 7th, 2005, 9:06 pm

- Province/State: Ontario
- Hometown: Ajax
- Model: 1978 Hatchback
Re: Restoration: Randy's 1978 Honda Civic (1200) Part 2
Two more videos uploaded to YouTube that covers the rebuilding of the rotted out inner rocker under the right rear passenger seat. As well as the panel that covers the hold down bolt for the front seat belt.
The panel under the rear seat consists of an extra inner panel that has an access hole to pass the wire through to the outer panel for the fuel tank float.
The bottom of the inner arch gets repaired too.
The last video is just under an hour long with captions of the tools used in the making the panels.
There is one panel I forgot to spray the back side with with rust protection before welding it in. I should be able to cover it with a rust protectors after the work is finished.
https://youtu.be/YYcPgvvle4c
https://youtu.be/6LMvaGO2dEM
-
Randy
- Administrator
- Posts: 1450
- Joined: April 7th, 2005, 9:06 pm
- Province/State: Ontario
- Hometown: Ajax
- Model: 1978 Hatchback
Re: Restoration: Randy's 1978 Honda Civic (1200) Part 2
Welcome to 2023
First post of the year, I was hoping to get further into the car over the winter months, however I am all caught up on the videos. If you have not had a chance yet check them out and like and subscribe to keep up to date.
A couple of pictures of what’s happening in the back seat passengers side making a panel to fill in the corner just behind the seat belt anchor.
Using a shrinker stretcher I was able to make one piece to the curved shape of the floor.
While I used a rounded hammer and the vice jaw opening to form part of the dimple in corner.
I tried using the Eastwood puck for the spot welds but it fails to work in the cold. The Princess Auto one works in all temperatures.
Next I have to make a piece that attaches under the floor and helps anchor the steady bar from the rear wheel. I know that’s not what it’s called but I am too tired to make a recall from the memory banks.
I will be preparing these bits first before I start welding.
- Attachments
-
-
-
Randy
- Administrator
- Posts: 1450
- Joined: April 7th, 2005, 9:06 pm
- Province/State: Ontario
- Hometown: Ajax
- Model: 1978 Hatchback
Re: Restoration: Randy's 1978 Honda Civic (1200) Part 2
A bit more is done, even in the cold of winter on the last wave before spring is sprung.
It is with great difficulty lining the panel up for the perfect weld in the corner.
It is with great difficulty lining the panel up for the perfect weld in the corner.
- Attachments
-
-
-
-
Randy
- Administrator
- Posts: 1450
- Joined: April 7th, 2005, 9:06 pm
- Province/State: Ontario
- Hometown: Ajax
- Model: 1978 Hatchback
Re: Restoration: Randy's 1978 Honda Civic (1200) Part 2
Had some difficulty fitting in the last pieces with the lip to support the floor patch.
While welding the piece in it kept blowing holes as the section on the end was very thin due to the rust on the back side. I kept hitting it with spot welds until it stopped blowing through. Then I could make a new patch.

Below I was able to get it welded in with just a few minor blow though welds.
Mind you the difficult seeming with my eyes makes very difficult to see. I have to be perfectly stable and not move my head, then I can weld good. I have wobbly eyes that don’t see eye to eye.
While welding the piece in it kept blowing holes as the section on the end was very thin due to the rust on the back side. I kept hitting it with spot welds until it stopped blowing through. Then I could make a new patch.
Below I was able to get it welded in with just a few minor blow though welds.
Mind you the difficult seeming with my eyes makes very difficult to see. I have to be perfectly stable and not move my head, then I can weld good. I have wobbly eyes that don’t see eye to eye.
- Attachments
-
-
-
-
Randy
- Administrator
- Posts: 1450
- Joined: April 7th, 2005, 9:06 pm
- Province/State: Ontario
- Hometown: Ajax
- Model: 1978 Hatchback
Re: Restoration: Randy's 1978 Honda Civic (1200) Part 2
When I get this cleaned up I will be posting this episode on YouTube.
Along with my new journey
I have been on since November, like relearning to crawl, walk, run (lol) and ride a bike again.
Along with my new journey
I have been on since November, like relearning to crawl, walk, run (lol) and ride a bike again.
-
Randy
- Administrator
- Posts: 1450
- Joined: April 7th, 2005, 9:06 pm
- Province/State: Ontario
- Hometown: Ajax
- Model: 1978 Hatchback
Re: Restoration: Randy's 1978 Honda Civic (1200) Part 2
Dumb, depth perception not working, while grinding down the patch above I ground right through the lip the floor will attach to.
Cut and patch is in place, I need something easier to get at.
Next I will move onto the floor.
It slopes in from the sides and the back towards the drain plug. Could be interesting. Easy I hope.
Cut and patch is in place, I need something easier to get at.
It slopes in from the sides and the back towards the drain plug. Could be interesting. Easy I hope.
-
Randy
- Administrator
- Posts: 1450
- Joined: April 7th, 2005, 9:06 pm
- Province/State: Ontario
- Hometown: Ajax
- Model: 1978 Hatchback
Re: Restoration: Randy's 1978 Honda Civic (1200) Part 2
How about a bit more today, got my exercises done early with some time leftover for the car.
The floor is curved in both directions as it slopes to the drain hole. I pre punched some holes for spot welding along the back lip as well as underneath on the side.
I tack welded along on side so there is some wiggle room along the back so I can hammer the welds flat.
Then I will do the spot welds last.
The patch material is slightly thicker than the floor, that makes it way easier to weld to the thinner floor. I direct most of the welds toward the thicker material to avoid blow throughs.
- Attachments
-
-
-
-
-
-
Randy
- Administrator
- Posts: 1450
- Joined: April 7th, 2005, 9:06 pm
- Province/State: Ontario
- Hometown: Ajax
- Model: 1978 Hatchback
Re: Restoration: Randy's 1978 Honda Civic (1200) Part 2
Moving along now headed to the floor on the front passengers side.
Here are some pictures of the front.
Here are some pictures of the front.
- Attachments
-
-
-
-
Randy
- Administrator
- Posts: 1450
- Joined: April 7th, 2005, 9:06 pm
- Province/State: Ontario
- Hometown: Ajax
- Model: 1978 Hatchback
Re: Restoration: Randy's 1978 Honda Civic (1200) Part 2
Here are a couple of shorts
https://youtube.com/shorts/o4ZvcJm_ATU?feature=share
https://youtube.com/shorts/lyLIi5ff-FE?feature=share
https://youtube.com/shorts/o4ZvcJm_ATU?feature=share
https://youtube.com/shorts/lyLIi5ff-FE?feature=share
-
Randy
- Administrator
- Posts: 1450
- Joined: April 7th, 2005, 9:06 pm
- Province/State: Ontario
- Hometown: Ajax
- Model: 1978 Hatchback
Re: Restoration: Randy's 1978 Honda Civic (1200) Part 2
I have the new top piece ready to on over the patched floor. I just have to grind down the welds and spray some primer in there beforehand.
From the pictures we can see I used a 3/4 punch and a dimple die to give it more strength and appearance.
From the pictures we can see I used a 3/4 punch and a dimple die to give it more strength and appearance.
- Attachments
-
-
