|
Shreck's
1978 1200 Project |
|
|
|
   |
|
   |
|
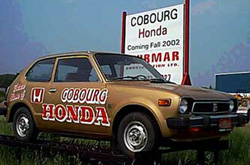
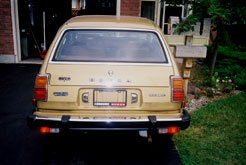
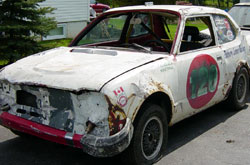
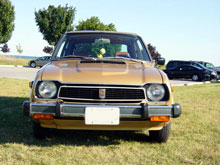
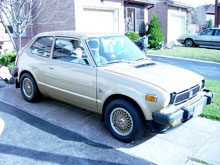
I purchased the 1978
Honda Civic in July 2002 from Cobourg Honda in
Ontario Canada. It has 134,000 original kilometers. Gold exterior, AM/FM radio with 2
door mounted speakers (looks like dealer installed when new). Purchased by
dealer from the original "elderly" owner in 1996 for display in their
showroom. It was repainted in 1997 in the original gold color in base coat clear
coat, since the original owner had the car painted white and
this was the only way she would buy the car when new. The interior is very clean with all original vinyl and carpet in excellent
condition, the drivers seat was replaced with the covers from
a passenger seat of the same colour car. The car sat 3 years in the dealers
showroom until the space was required to display current
models.
Many new parts including front
calipers, hood, rear hatch,
door, fenders, bumpers and filler panels. Took me about 1 week and $95.00 to get it certified.
Parts I had laying around including 2 drive shafts, 1 upper strut bearing, 1 tie
rod end, front strut and lower ball joint. New parts included 2 rotors, pads and
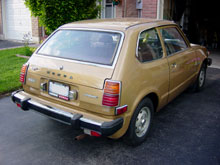
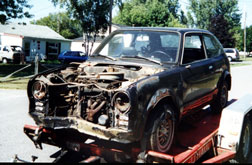
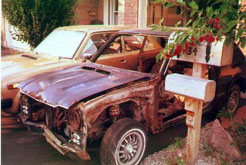
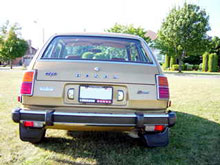
tires (the tires witch I stole from my restoration project car). Its a good looking original First Generation Civic
considering it is from Ontario as most of them have the floors and rocker
panels rot out of them in one place or another. They tend to rot in the corner of the windshield as well letting water in to continue the rust
process on the floor pan.
|
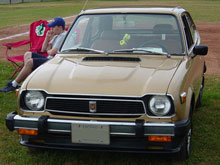
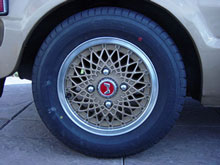
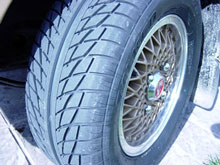
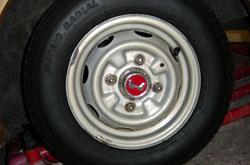 It
still had the stock size tires (155/80 12 inch) that were badly
cracked in the side walls, and I have future
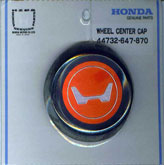
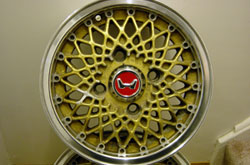
plans to upgrade to better tires. The center wheel caps were
missing the typical red paint so I cleaned and repainted them using
a good artist paint brush and enamel model paint.
Finding the stock tires can be a bit of a challenge depending on
where you like. Dealers said they could get them from a Korean
company or bring them in from the USA. Not even places like Canadian
Tire stock this size. Pay a visit to Wal-Mart auto center and you
will find them in stock. You may even find a wider flavor of our
12". It
still had the stock size tires (155/80 12 inch) that were badly
cracked in the side walls, and I have future
plans to upgrade to better tires. The center wheel caps were
missing the typical red paint so I cleaned and repainted them using
a good artist paint brush and enamel model paint.
Finding the stock tires can be a bit of a challenge depending on
where you like. Dealers said they could get them from a Korean
company or bring them in from the USA. Not even places like Canadian
Tire stock this size. Pay a visit to Wal-Mart auto center and you
will find them in stock. You may even find a wider flavor of our
12". |
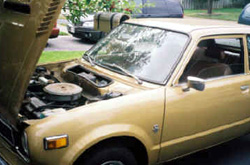
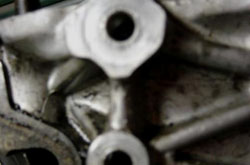
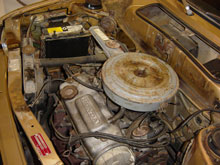
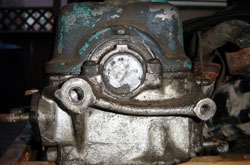
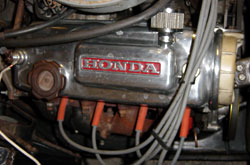
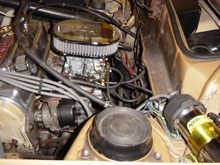
Since I took these pictures, I drove the car for only 2 days
after certification (Sept 2002). This is when I found that the cast mount
on the drivers side of the engine block was broken right off. The camshaft key
way and cam wheel is badly damaged. I can only assume that it came loose from
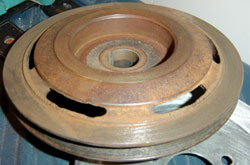
vibration from the broken mount. The timing belt was also chewed up. This is what it
should look like on the far right. Checking a little further, this is not the original motor, it
should be an EB3 but in fact has a EB2. Before Cobourg Honda received the car
someone must have done an engine swap with a defective mount. I checked over the
car and could not find any damage to the body to verify it had been in a
collision. This is usually how the mount breaks. It also had a rebuilt automatic
transmission put in a some time.
On further examination I noticed
that one of the starter bolts were loose and the loner one was
hanging out. When I removed the rocker cover all the front rocker screws were damaged as if it had been
knocked over somewhere. After some serious thought I wanted to keep the car
original, I had an extra EB3 engine, I took it in to
Scarborough Engines to have it rebuilt but could not source
over sized pistons. Many years ago they were a major
re-builder for
Honda. I also have a 5 speed transmission w/chrome shifter to put in during the
swap. The motor sat for three months at the shop at which time I ran
into a chap that was racing these cars at Mossport dry
raceway
and on ice during the winter. He had 4 ice racers and
one stock car. (2 ice racers were rabbits)
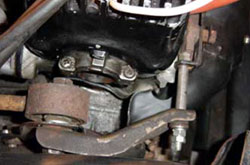
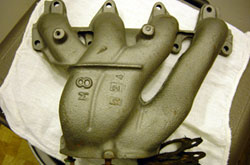
This is what a typical mount would look like to replace the broken off
motor mount. This one bolts on the ends of the head beside the
distributor and on the opposite side. I could not find one of these
at the time the damage was discovered, otherwise I would have taken
this easily resolved solution. |
|
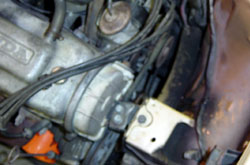
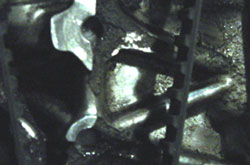
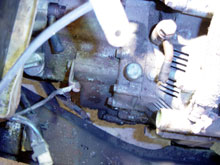
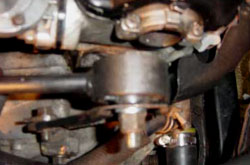
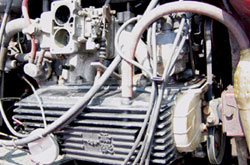
Timing belt debris on right of engine bay from when the cam wheel came
loose and wobbled part of the belt away and damaged the keyway to an un-usable condition.
Some mechanic had tried to make this do by drilling deeper holes and tapping it,
this was a total failure as there were only 2 threads and the other bolt was just sitting in the hole
resting and waiting to fall out. None of the broken off parts were found under the
timing covers which is a good indicator of a failed job unless
this was done to deceive the owner at the time offering an
engine swap with a defective block that could have very well
come from a written off car as these mounts easily break
during a side impact. This was a totally botched job to just pawn the problem off onto some one else.
However the motor runs very well and does not blow smoke or
make any unusual noises. |
|
Parts
I need for my spare EB3 rebuild:
Oversized pistons, at this point I am
willing to take any range of oversized pistons. The pistons
are difficult to find locally but can be custom made at a much
bigger expense, approx $420.00+ US. Other parts needed are
rocker shafts and 2 rockers that are also hard to find so I
will be re-cycling some used parts from another motor. Pretty
much I have most of the other parts new such as complete oil
pump, water pump, valves and guides and new bearings. Gaskets
are pretty easy to find if you keep your eye on EBay.
|
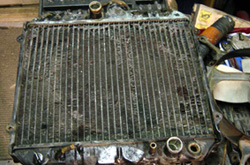
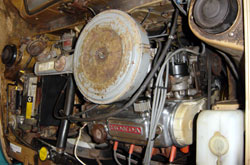
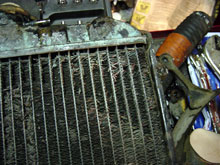 The radiator is in very poor condition
as you can see parts of the core have fallen out already. I
got the radiator re-cored at Kawartha Radiator in Lindsay for
about $175.00, it has a new copper core and should last
as long as I own the car. The radiator is in very poor condition
as you can see parts of the core have fallen out already. I
got the radiator re-cored at Kawartha Radiator in Lindsay for
about $175.00, it has a new copper core and should last
as long as I own the car. |
|
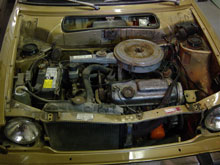
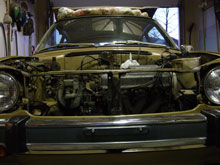
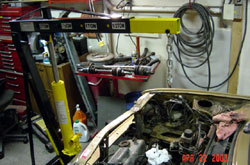
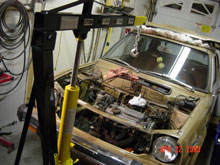
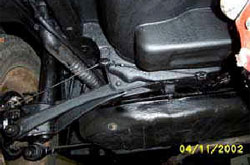
I have prepared to pull
the motor, Removed the grille and hood as well as disconnecting
the shifter linkage and carburetor choke and accelerator
cables. The front suspension was removed and axles pulled as
new shocks, strut bearings including strut
tops and rotors and bearings were to be installed while
the motor was out. The steering rack was pulled too as I
wanted to install a rust free newly painted rear cross beam.
|
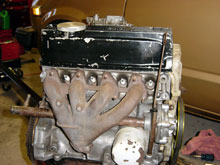
This is
my EN1 head W/broken off mount |
EB3 head for 78-79, note the differences
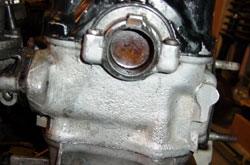
EB3 heads have an "H" stamped on the front passenger side
while the EB2 has a "S" in the same place.
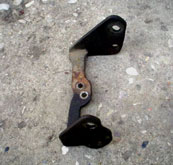
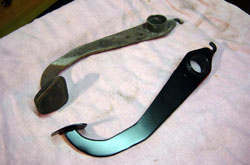
As for the broken mount I will be using a modified
transmission bracket from an second generation civic for the
torque rod to attach to.
I fabricated a bracket for the torque rod to fasten to,
picture on the right was my second shot after breaking the
first one a couple of times, It kept on breaking the bracket
that bolts on through one of the starter bolts and one of the
transmission bolts. I had to double up the thickness of the Honda
bracket to take the torque. I then attached the old outer
torque
rod bracket and attached a rod from it to the manifold which
seems to be holding quite well so far.
The bracket would still bend away from the head causing the
muffler to break off as well as bending the strap that holds
the downward exhaust pipe. This is also my second muffler, The
first one broke off right at the muffler.
Here is my new design, you can see I used a stock bracket and
flipped it with a 3/8" rod with a bracket on the manifold.
This method is really strong.
Here is my first
attempt at making the bracket work. Bummer total failure, the torque from
the motor causes the A bracket to bend away from the head causing the
mount to break the metal tab used to attach to the starter motor bolt. I
welded it back up, this time the tab is about 1/4" thick and the
other leg of the "A" has to be beefed up as well as it broke the
leg off.
|
|
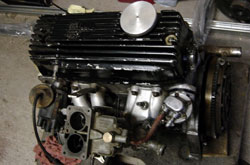
Well I didn't get my EB3 rebuilt,
for a lack of finding over
sized pistons, instead I bought a newly rebuilt motor that came out of Jeff Wenzel's Ice Racer, previously rolled.
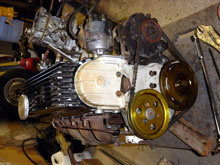
It's only run about 50km since the motor
was rebuilt and all I had
to change is the oil pan as it had a tiny rust hole. The bottom and top end
of the motor is spotless. It is an EB3 Motor with and EN1 head from a second generation Civic.
The new motor has a lightened fly
wheel, racing cam, new pistons and rings, bearings, Ported
head with a Weber carburetor and strangely I did not notice at
first but it has a Mugen valve cover and EN1
head.
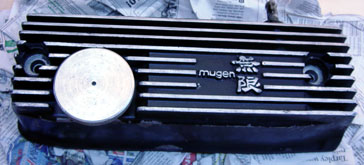
The Mugen valve cover will fit any of
the first generation Honda Civic heads being of the EB1,
EB2 or EB3 types including the second generation Honda Civic
EN1 types too. This will not fit the CVCC Engines.
|
|
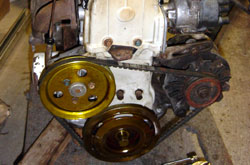
Delivered right to my door.
Cleaned up and ready to go in. The
extra pulley has been shaved off to reduce
weight and to gain minor power.
|
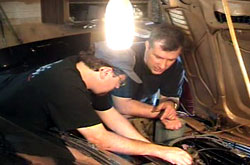
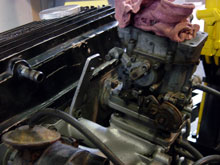
Here
Colin Kennedy is helping me trying to set up the timing and the
Weber carburetor. In the end the timing had to remain advanced by
about 28 degrees plus. I found out later from the guy I bought it
from that it has a racing cam shaft and he kept it at about 35. He
said it is going to be difficult to take this motor and put it back
to street use with out too many problems. One
thing for sure is the exhaust is too small as I am using
stock, I noticed that starting is difficult but for some reason when
I had the muffler off it started first shot. I have taken the Weber
off the car and put the stock carburetor back on and this seems to
have helped a bit.
Turns out after a little research that the 28DCD Weber carburetor is used
in the UK or European countries on the Ford Cortina. No wonder I had
problems with it. The adapter is a standard Weber intake manifold
adapter for the Cortina, however it has been welded to the Civic one
since the bolt holes do not line up correctly.
|
|
Below are some goodies I bought from Jeff, left a Momo rubber
grip racing wheel, and
below Cheviot 13x5.5 rims.
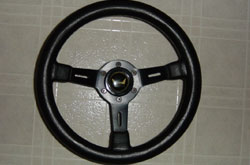 This MoMo steering wheel for a first
generation Honda Civic can easily swapped for the stock steering
wheel. It turns out that the horn did not work when making a right
hand turn. Now why is that, could have something to do with the use,
I can only guess that making constant turns on an oval track is why
the contact plate for the horn was worn through to the underlying
plastic.
This MoMo steering wheel for a first
generation Honda Civic can easily swapped for the stock steering
wheel. It turns out that the horn did not work when making a right
hand turn. Now why is that, could have something to do with the use,
I can only guess that making constant turns on an oval track is why
the contact plate for the horn was worn through to the underlying
plastic.
Solution: Bend the contact arm to make it
longer or shorter so that it does not ride in the worn out grove.
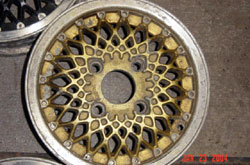 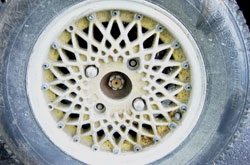
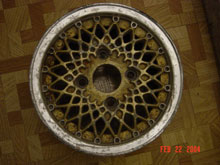
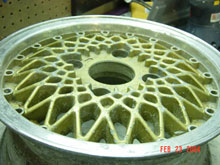
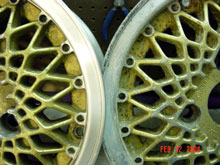
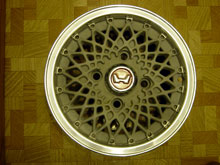
I am hoping that these worn out old Cheviot
13" wheels can be brought back from this horrid state of condition.
Many years of racing have left scars on the aluminum wheels. Most of
the fake screws are missing from the outer diameter of the wheels.
  |
|
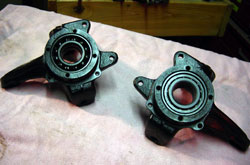
I had started to refinish these steering knuckles for my other car
but decided to use them on this car as they were already removed and
ready to go for new bearings and seals.
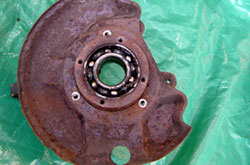 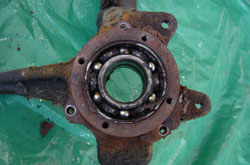 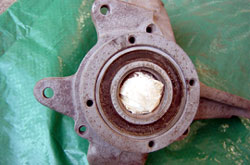
Finished and ready for new bearings
 |
  |
|
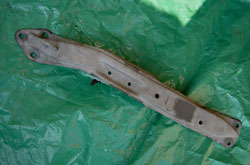
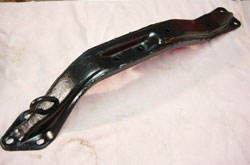
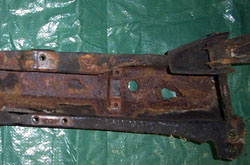
The rear engine
cross beams are mostly rotten and full of holes in
Ontario junk yards if you can even find one, I have gone through
3 and all are badly rusted, it is hard to tell until you get if
off and then find there are holes in the top. The one on the
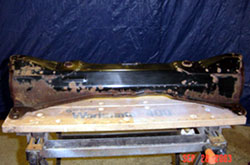
right I bought from Vancouver Canada and just had to cleaned it
up a bit and repainted it. The one on my other project car has a
big hole through one end close to the control arm.
   |
|
Pictures below give an example of before and after. These
are pretty rusty given the amount of road salt that is
required to keep roads safe in the winter months. I replaced
the rubber on the shifter and pedals too.
|
|
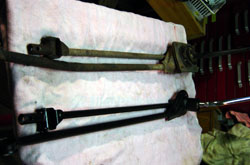
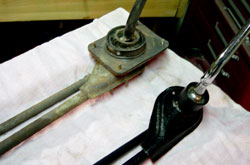
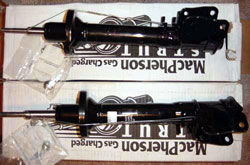
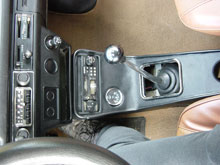
This is the funny stuff, the
new shocks I bought up from
California for the
front and rear. Ebay I replaced the front ones
right away, but when I was asked to take some under car pictures
of the rear wheels is when I noticed that something
strange was
going on. The picture on the left is the actual back of my car,
that's a CVCC rears
suspension, I am very surprised to see it
on a 1200 Civic. The U shaped shock is for the 1200
where as the CVCC bottom has no bracket
similar to the
front shocks.

CVCC rear shocks
|
1200 rear shocks
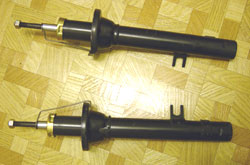 
Turns out that, (Colin) The lower control and trailing arms +
the shocks and rear brakes in your car are from a 78 CVCC hatchback that the
dealership acquired for parts in 1998. The shock spring mounts were
rusted bad on the original shocks, so we just changed everything on
both sides. To be honest, I never noticed the difference when I
changed them, but it is pretty apparent now. |
|
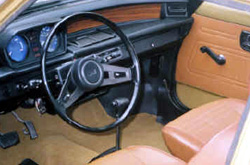
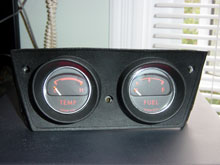
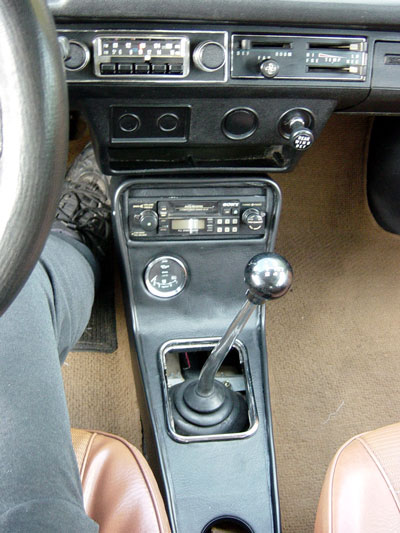
During the cold days of February 2003 I fixed up and
recovered a floor console from a scrap car I bought during the summer of 2002.
I found an good old Sony stereo cassette to fit in. I am to going to get another gauge
to put beside the oil pressure guage. You can't see it (covered up until I am ready
to put it in) but this console has a spot for toggle switches
or pilot
lights.
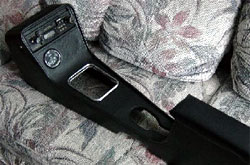 
Unfortunately the glue used to attach the
black fabric was of poor quality and it came unglued. |
New OEM Honda Civic rear mud flaps.
I
attached them stainless steel 10mm bolts and nuts, I concealed them
black under plastic bolt caps that can be bought at Home Depot in
the bolts section. The caps can be easily removed at ant time and
blend in perfectly with the mud guards. |
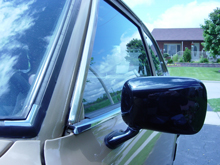 
New OEM Special X mirror, The Special X Honda Civic was only sold in
Canada. One was not enough, I had to buy two of them. One of them is
in my Trophy Case with new Special X wheel caps. |
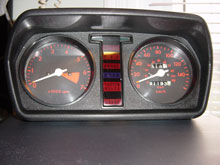 
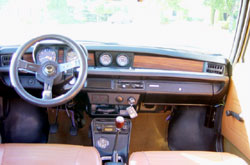
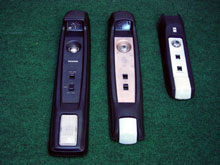
Special X Tachometer Cluster and Center gauges.
A sweet trade for a 76 overhead console as seen in the picture
below.
I cut out the wood grain section in the middle
of the dash to find a blank filler plate that is easily popped out
to access a wiring harness to the left of the opening, If I remember
correctly it was taped to the main harness. |
Before and after pictures of a Kamei Front Air Dam. It adds a little bit of
character. I have been eying these for a long time on Electrodynes
web site. Until I was asked if I knew where to find them. I never
really thought they had any left. To my surprise they had 9 left. So
I bought two of them for $65.00each. I mounted them with the same
hardware I used abouve for the mud flaps. |
|
7/30/04 recent improvements include Prelude seats an overhead
console and a wooden 3 spoke steering
wheel. Polished original valve cover to replace the
dreadful looking Mugen
one.
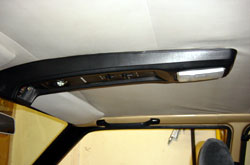
One thing to consider if looking to acquire an
overhead console for your first generation Honda Civic is the years.
The 73-77 console is slightly narrower at the end where the done
light is covered up. Using the old one will leave a minor gap where
your old dome light was removed. The older Civic use a round dome
light, where as the 78-79 uses a rectangular dome light. It's like
putting a circle in a square, you will have spaces at the edge.
Images of 78-79 and then 77 and older Civic
and last is the console from a N600 coupe, notice how similar it is
to the earlier Civic type less the clock.
Some of the clock don't work so well but these
can be repaired or you can re-calibrate it your self.
|
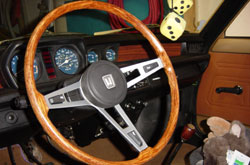
I
bought this wooden steering wheel from an auto wrecker in Oregon
when I enquired about other parts I was originally looking for. This
is from a 1977 CVCC Civic. I also pick up some rust free door
handles and rear license plate lights and scored a tachometer and
center dash cluster gauges. I stripped
the old varnish off the wheel and too any rough edges of. The metal
spokes were also repainted. This wooden wheel and shift knob gives
the car a real classic look.
|
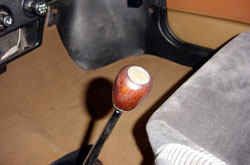
Wooden
shift know to go with the newly acquired steering wheel. Seems to be
made of a soft wood and capped off with a brass insert for the five
speed. I have since restored the shift
knob and repainted the brass insert to it original colour. |
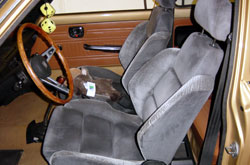
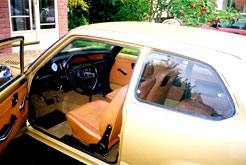
Ah!
Seat swap, Nice and comfy and a great back support with side
bolsters. These seats are from a 91 Honda Prelude. I used a
combination of the original Civic rails along with one of the
Prelude rails. I removed the inside sliders and welded a flat bar
from the outer rails to the inside bar. This allowed me to bolt the
Civic stock rails in place. |
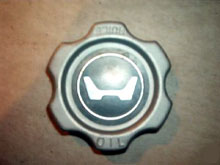
I
bought this oil filler cap on the internet on line auction. I am not
sure if its a Honda original or just and aftermarket creation. Its a
little rare, but I don't think there is much value other than its
just different. I ended up buying new original OEM old filler cap
that looks a lot nicer because of the shine I guess. |
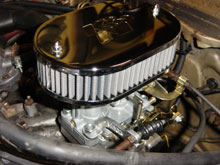
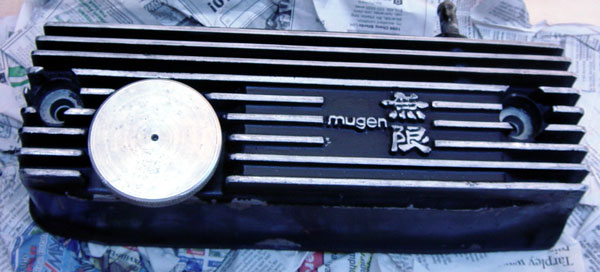
As
you can see I have not used the Mugen cover. I purchased this nice
polished cover instead because I am looking for a different look. I
just need to get rid of that dirty breather |
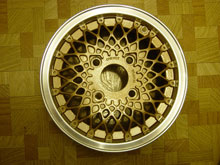
Finally
got around to refurbishing these old beat up Cheviot 13x5.5" wheels,
This size can be found on the Accords if you are looking for some in
the 4x120 bolt pattern. I started of by
using a coarse flat file to take the gouges out, followed up by the
use of a Drumel tool to get at hard to reach places in between the
webbed patterns. The use of many grades of water paper can make this
job go a lot quicker and less work. I started off with 40grit
60,80,120,240,400,600 and finished of with 1200grit. A final chrome
like finished was obtained by using Mother's Aluminum Polish.
To get the Honda Civic Stock wheel caps to fit
the Cheviot wheels I filed off the ridge from the opening, Minor
bending of the cap tabs was also done. To help the cap maintain a
tight fit I drilled 1/8" divots inside the opening for the dimples
on the caps to sit snugly in.
Before the final finish can be applied the
outer polished areas are taped up with Duct Tape. This is done to
protect the finish from the sand blasting that will remove the old
paint and even out the rough areas that were repaired.
To sandblast I created a small area in the
garage with blue tarps with weights on the bottom. or you can use
plastic shower curtains from the dollar store that have weights
built in already. After the sand blasting I cleaned the wheels with
mild soap and a pressure washer to clean them up. I left the duct
tape in place while cleaning.
I went down to the local Napa auto parts store
to get my cars colour mixed and put in two pre-charged cans for easy
application. I also bought clear coat for wheels, but the type I
used must be applied while the base coat is slightly tacky. I
removed the Duct Tape after the base coat (colored) was applied.
The area where the tape was cleaned with paint and silicone remover.
I put several coats of clear coat on the entire face of the wheels.
When the clear coat goes on its a milky colour, Don't panic now, it
clears up as it dries.
|
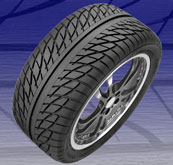
Finally its time for some cool performance tires. It was not easy to
find descent tires that I wanted for summer use only. I went with
Falken ZEX502. I waited a long time to get these as they were
discontinued at the time I ordered them. The dealer ordered them in
from the Falken warehouse in Quebec but when they arrived at the
dealer they all had gouges on the inside of the tires. Turns out
they had been returned because they did not fit someone's
application. There were no more of these in Canada so Falken found
them at dealers in the USA and paid the shipping to my dealer.
  |

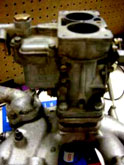
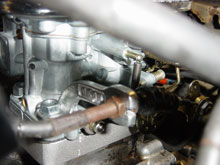
Here is a deal, $165.00 us for a Weber 32/36DGV manual choke carburetor.
I only wish I had bought one more at that price.
This kit is easily put on and includes all the
parts needed to get you up and running in no time. It also includes
the bracket that goes on the intake to hold the throttle cable. This
is a good carburetor for the every day enthusiast looking for more
power and performance. This is not the best one to use if planning
some serious driving as this Weber has problems in the corners at
high speed.
One modification I have to do is to remove the
area of the intake that the adapter covers, I just have to remove
the material in the opening of the adapter. This will also give me
better performance as well. This was a good time to replace all the
old vacuum lines.
  |
Next job on to bigger exhaust then on with the
Webber. |
