Project MIELKO First Generation Civic SB1 from Holland
- mielko
- Projects
- Posts: 336
- Joined: January 5th, 2010, 12:39 pm
- Province/State: Europe,holland
- mielko
- Projects
- Posts: 336
- Joined: January 5th, 2010, 12:39 pm
- Province/State: Europe,holland
Spent some time in my garage today.
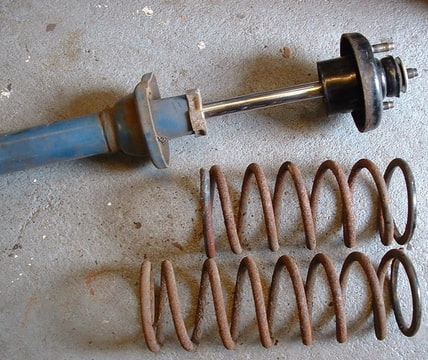
How to lower the rear shocks.
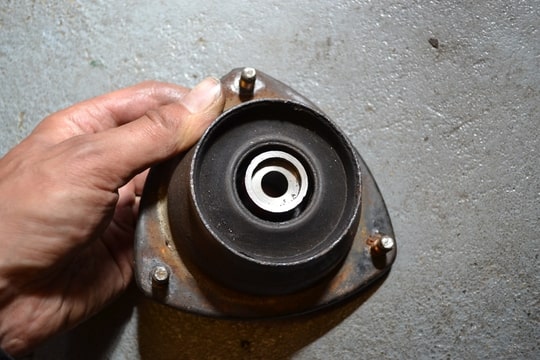
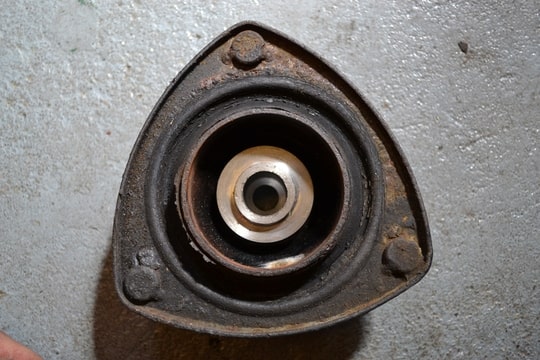
I took a civic 88/99 spring seat .The steal bush in the rubbers dont fit the EB strut stem.But you can swap the steal bush ,just press it in.No need to shorten it .It fits!
Left New ,right Old EB
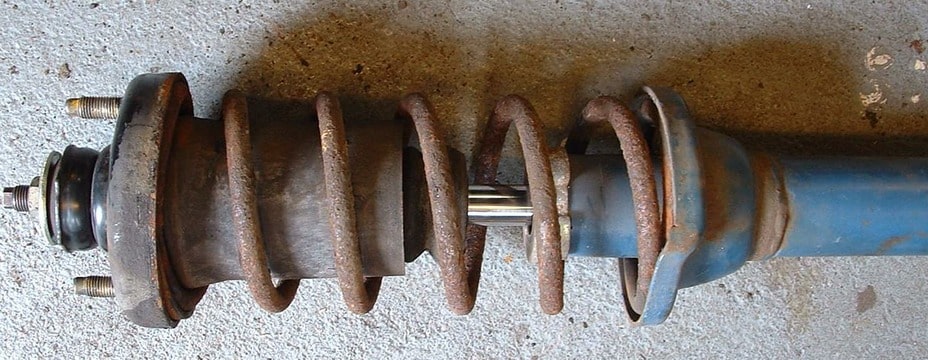
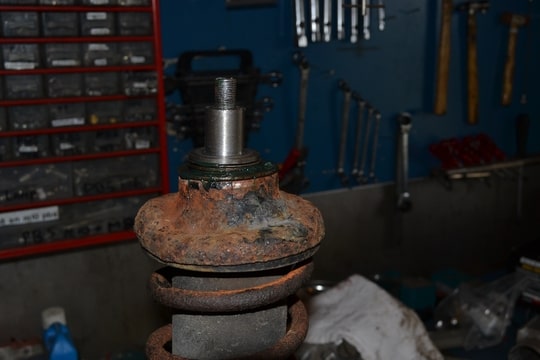
Why use that spring seat?The rubber mounting is sitting on top of the seat.If you mount it on the strut stem,the seat will fall deeper over the stem.
The distance between top seat and strut seat is shorter now.So now you can mount shorter springs.
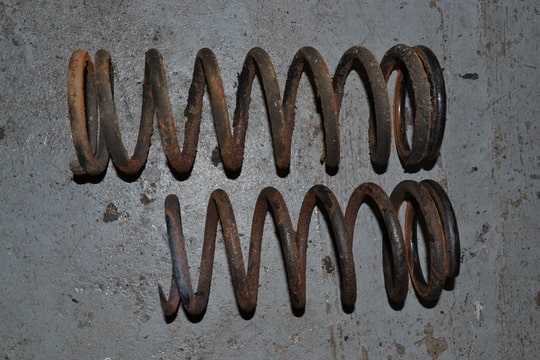
I did not take the effort to find shorter springs,i cut and heated the oem's .
Everething mounted.
I dont know how much lowered it is now,still need to mount them on the car.
I'm now brainstorming on how to do the front.
Is my englisch understandable?
- mielko
- Projects
- Posts: 336
- Joined: January 5th, 2010, 12:39 pm
- Province/State: Europe,holland
My 4x100 is almost done,
got some new bearings for all 4 corners.Just need to press them in.
I de rusted everything and brush painted it with steel pain.
For the rear ,i just made it myselve easy.
Redrilling :D
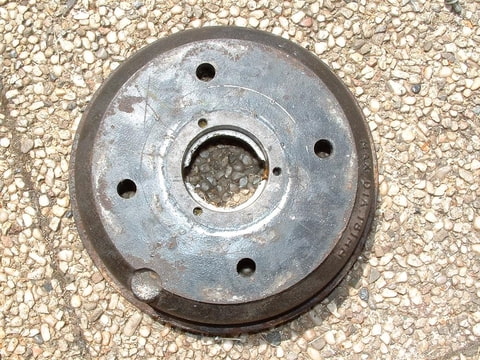
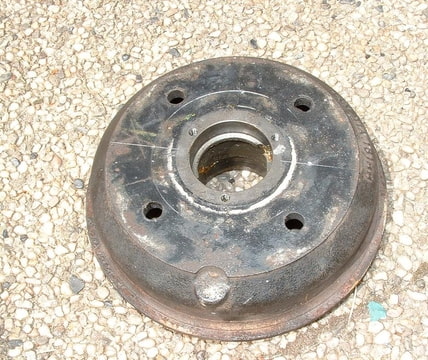
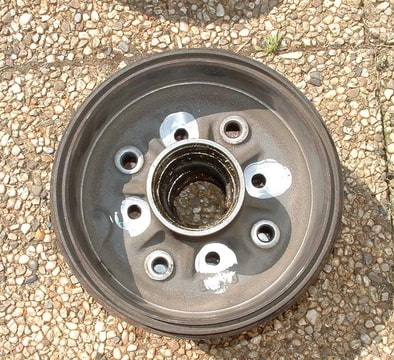
Put the drum in a lathe,and mark the 100MM
Then you calculate the distance between the hole with pythagoras and set it out on the circle.
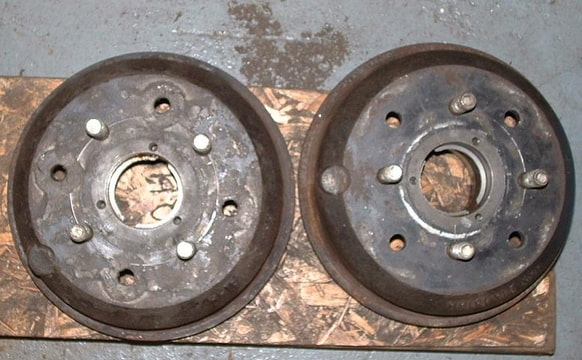
Then drill the holes.You could now put some new studs in,but i find them a bit badly flush with the metal.The are not nicely flush with the surface of the drum because of the shape of the drum.
So i machined it,to surface then neatly .
I used some studs of a 92 civic,as the thread has changed after 1980.
I could not use the ones that were in if i didnt wnt to end up with 2 types of lug nuts.
I need to put the bearings in next.
It was not difficult to get them,its standard size bearing skf 6304 en skf 62/28 ,even the seal was a standart size
The front hub is almost ready.
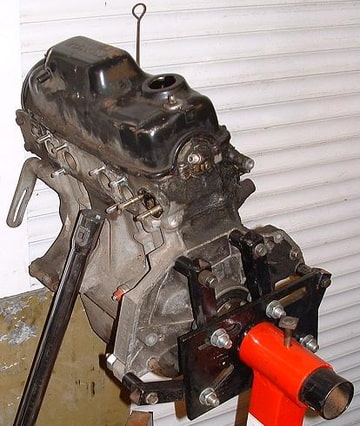
At the same time i am making a replacement engine,to swap my smoky and smelly EB1.Just put in a new gasket.and a good oil flush.
When thats in,this engine is gona be next.
Its gona be build for power.
Its a 1300EN,where A EB 1 ,yes 1 :twisted: ,is gonna be on.
It will make a engine with comp 12/1 almost.With the nice torq of the EN1300.
It can make 100HP :mrgreen:
-
- Short Shifter
- Posts: 53
- Joined: August 8th, 2010, 3:18 am
- Province/State: Chelmsford
That Golf GTi lip looks great. I was looking at these but assumed they wouldn't fit.mielko wrote:Made a cardbourd tamlet today,drawn it on the lip.
Cut it out witch a thin grinder .
Test fitted .
and made the final adjustment with a band sander.
Now the GOLF 1 GTI LIP is on
:D
Assumption is the mother of all Frak ups...
So to question time: How easily does it fit? does it just go straight on?
Thanks, and great work!
James
- mielko
- Projects
- Posts: 336
- Joined: January 5th, 2010, 12:39 pm
- Province/State: Europe,holland
The golf is almost flat,with a small curve.
The civic has a small bulb in the mid section.
I took a piece off cardbourd(you could also use paper) were is cut the shape off the civic out.You can cut easyer on that to make a finish product.When your tamplet finished,just mark the shape on the lip and cut it with a "dremel"or so.
Than it fits on your car.almost.As you need to take little bits of the back to give it the angle you want.I did that with a belt sander.
Last thing to do is making a small bracket to suport the mid section.
Its pretty easy,no rocket science
good luck! :D
- mielko
- Projects
- Posts: 336
- Joined: January 5th, 2010, 12:39 pm
- Province/State: Europe,holland
Spent some time in my garage today.
How to lower the rear shocks.
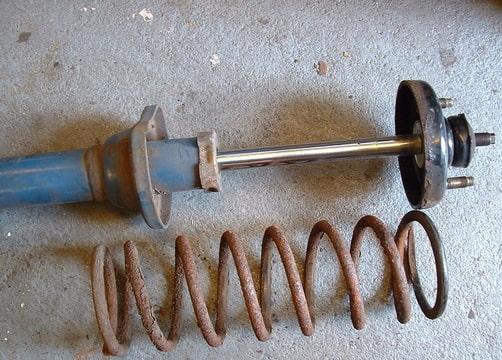
I took a civic 88/99 spring seat .The steal bush in the rubbers dont fit the EB strut stem.But you can swap the steal bush ,just press it in.No need to shorten it .It fits!
Left New ,right Old EB
Why use that spring seat?The rubber mounting is sitting on top of the seat.If you mount it on the strut stem,the seat will fall deeper over the stem.
The distance between top seat and strut seat is shorter now.So now you can mount shorter springs.
I did not take the effort to find shorter springs,i cut and heated the oem's .
Everething mounted.
I dont know how much lowered it is now,still need to mount them on the car.
Now my version lowering the front,
I wanted something like i did on the rear,but kept breaking my head on the bearing and turning movement of the complete set.
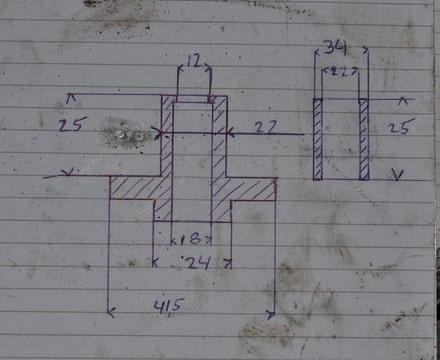
I had a sleapy night shift at work,and came with this idea
This is a rough sketch ,measuments are MILIMETERS(metric system)
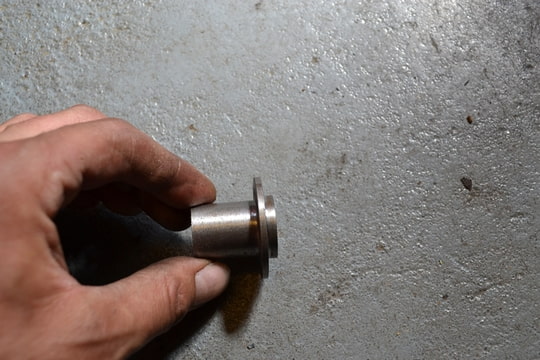
This is after finishing .
What does it do?you will think?
As its hard for me to explain in english ,an other sketch
Now fitting it all,
First you find your lowerd spring,cut spring or heated spring,what ever you are used te do.
I'm been using cut springs for years on road cars,and it works 100% for me.
No coments on this way of lowering as topics have allready been filled with do's or don'ts
Place them on your strut and put the spring top on.
Place your bearing and seal like normal.
Now comes my bush/sleeve what ever you call it.
It will line your bearing nicely in the middle
Now your strut top would come..But due to my new bush it will not fit.
You need to file ,cut or drill the hole in the strut top to 22MM,so the it wil fit.
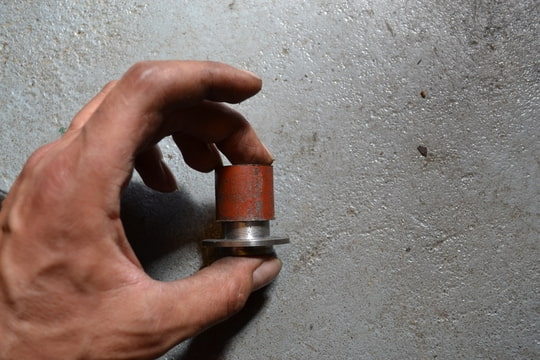
This pic is with my bush fitted in the strut top
Now you can put it all together,but to lock the complete shock you need the last part.The outer sleeve .
Without this sleeve your strut middle"piston/shaft" (whats the name?)wil pop out of the strut top when it bumps out while riding your car.
Just put the oem washer as normal,it wil push the outer sleeve down and locking the middle bush in the strut top
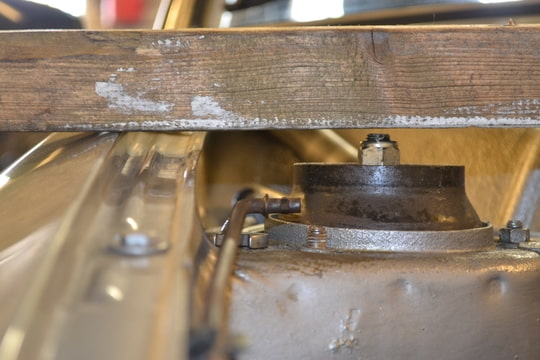
This is how it looks after fitting on the car.
You can see the is enough room between nut and hood,you could even make the bush/sleeve even longer,as the hood runs a bit round,and nod dead flat from left to right..I think you could make it to 50MM or more.
So,i you can use my brainstorm idea's :D
Is my englisch understandable?
- mielko
- Projects
- Posts: 336
- Joined: January 5th, 2010, 12:39 pm
- Province/State: Europe,holland
Brake Upgrade
Because i made several mistakes,its now time to tell,so that others wont
Deu to not reading the 4x100 how to on this site i mis used things.As pinions and control arms.
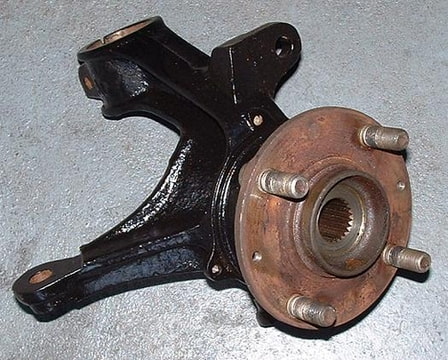
When i assembled my 2nd gen knuckles onto my sb1 i noticed that my new bearing had some "play"on it
When i drove it,the brake disk even scratched the caliper.
WHY :shock:
Settled for a couple days,and took it apart.
What went wrong.
After measuring a lot,i found out that the splines on the pinion are not long enough.In stead of locking the bearing,it now locked the splines.
Again did some research here and read about this.
In stead of putting on some 2nd gen pinion it put it in my lathe.
Just to be sure the pinion would slide in to the knuckle far enough
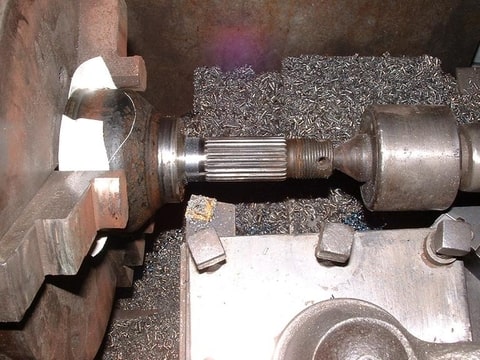
Fit it al together ,and yep...its does the trick!!
Drove it again.No scraping sound anymore luckely
Stil it did not drive good.Loads of feedback on the steering wheel.
Why????
I had it lined out at a shop.
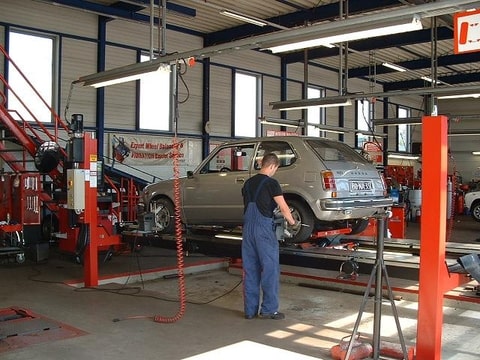
Found out that i had way to much positive camber.
Why....
1stgencivic.com.....thanks again for the info.
Problem,i had to use 2nd gen lower arms,to compensate the knuckle.
But ,why not do it differend.
I was checking the scrap metal containers at work and found something i could use almost plug and play.
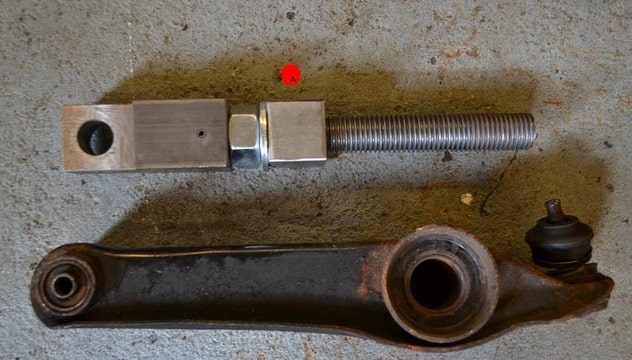
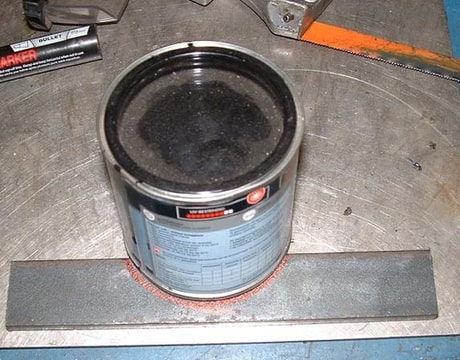
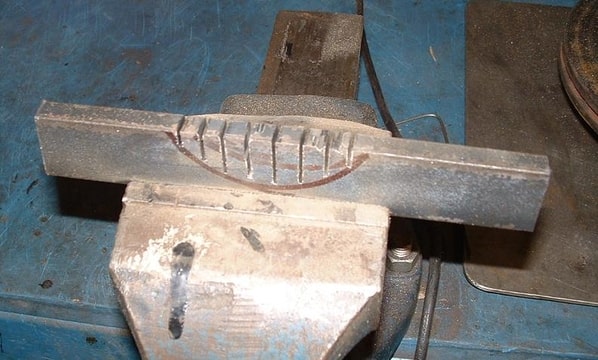
I only made the square part.Its just a solid block of metal ,with i drilled and tapped.
Something anyone can do with minor tools.
Than take a control arm.and start cutting..
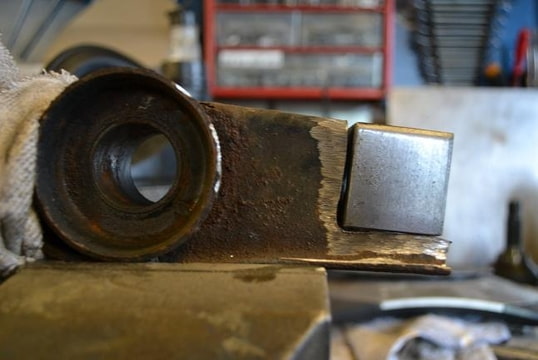
And start welding TIG.
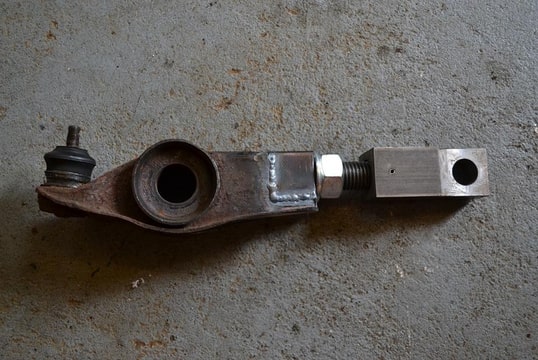
I cut out the rubber bushing out of the scrap piece control arm.I'm re using it,and put in my home made arm.
Than re alligne
And drive!!
Doing 4x100 swap the right way
To share some some info to you guys.
Here by a pictorial on how to swap to 4x100
On this site is already a tutorial on how to do it,BUT I dont like this one
viewtopic.php?t=12530
Why is it that i dont like this one,I'v done it.But took it of after riding it and realignment .
Due to the fact that you use the lower control arm and 2nd gen hub ,your wheel span wil change big,it will widen out a lott!!
Now you will not be able to put wider wheels on your car.Your positive camber is still there .So steering is BAD.
This is what i recomment,this is what I think is best.
You can give reply's if you think I am not right,I dont mind
What do you need:
1st gen knuckles
1st gen brake calipers
2nd gen disk brake
2nd gen hub(4x100)
Wheel bearing (1st or 2nd gen ,both will fit)
2nd gen 80/83 pinion or modify the 1st gen item(shown later)
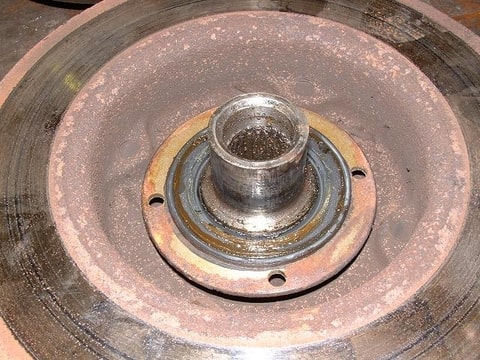
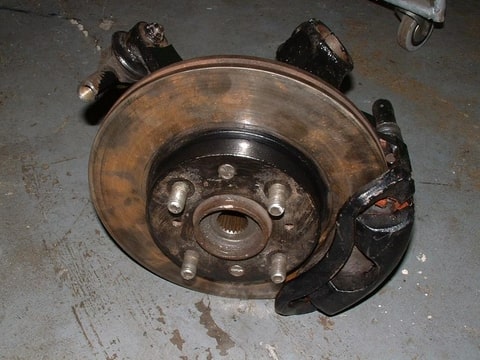
This is what a 2nd gen hub looks like with dust seal of 1st gen on.
1st gen dust seal on 2nd gen hub
1st gen hub with 2nd gen seal and visa versa
So now you know its fits!!
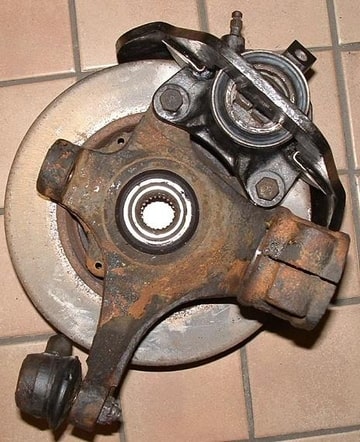
2nd gen knuckle and 1st gen knuckle
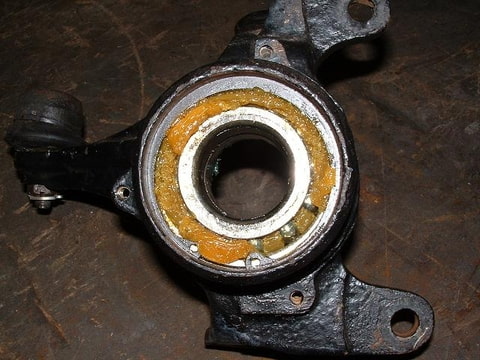
1st gen and 2nd gen bearings,both wil fit in 1st or 2nd gen knuckle!
Now beforen pressing it all together ,you need to shorten the bolt heads of the dust seal.When the 1st gen hub is fitted on the knuckle you got clearance couse its 4x120,so more space.
The 2nd gen is 4x100,so 20mm less clearance.
Grind of the bold heads,that is the easy way
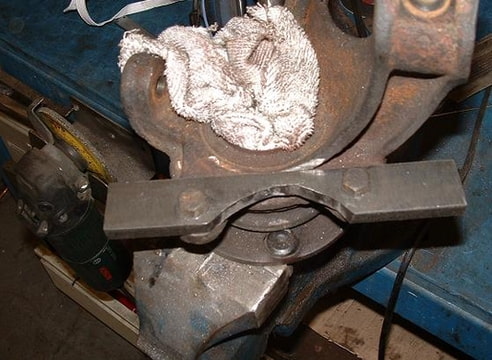
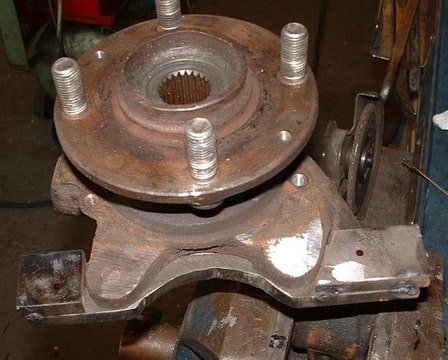
Than put it al together,2nd gen hub in 1st gen knuckle
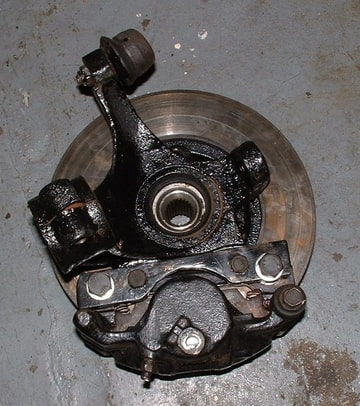
Than put 2nd gen disk brake on,and 1st gen brake calipers.
Now you are almost done
The pinion head of the 1st gen will not fit the hub,the splines run all the way on 2nd gen hubs,1st gens run 2/3 the way.
So you need to swap the pinion head to 2nd gen 80/83 on your axle.
I like it easy,1 just put my pinion my lathe,and made more room on the spline track.Just made it a bit deeper,so the splines of the hub wil slide further on de pinion head.
I even made the swap better:
what i used
1st gen knuckles
2nd gen hub
2nd gen bearing
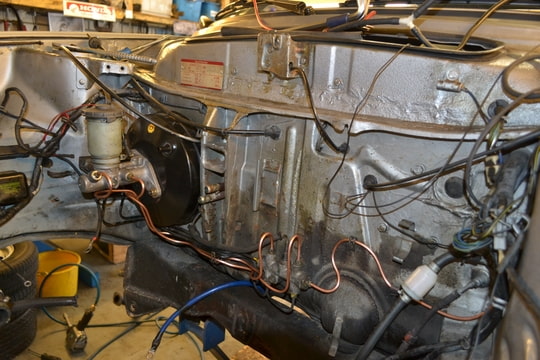
civic 92 brake booster and main cillinder
civic 92 vti brake calliper and disk
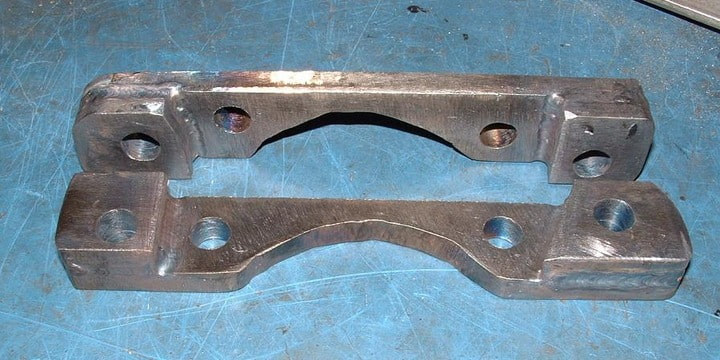
home made bracket
Deu to not reading the 4x100 how to on this site i mis used things.As pinions and control arms.
When i assembled my 2nd gen knuckles onto my sb1 i noticed that my new bearing had some "play"on it
When i drove it,the brake disk even scratched the caliper.
WHY :shock:
Settled for a couple days,and took it apart.
What went wrong.
After measuring a lot,i found out that the splines on the pinion are not long enough.In stead of locking the bearing,it now locked the splines.
Again did some research here and read about this.
In stead of putting on some 2nd gen pinion it put it in my lathe.
Just to be sure the pinion would slide in to the knuckle far enough
Fit it al together ,and yep...its does the trick!!
Drove it again.No scraping sound anymore luckely
Stil it did not drive good.Loads of feedback on the steering wheel.
Why????
I had it lined out at a shop.
Found out that i had way to much positive camber.
Why....
1stgencivic.com.....thanks again for the info.
Problem,i had to use 2nd gen lower arms,to compensate the knuckle.
But ,why not do it differend.
I was checking the scrap metal containers at work and found something i could use almost plug and play.
I only made the square part.Its just a solid block of metal ,with i drilled and tapped.
Something anyone can do with minor tools.
Than take a control arm.and start cutting..
And start welding TIG.
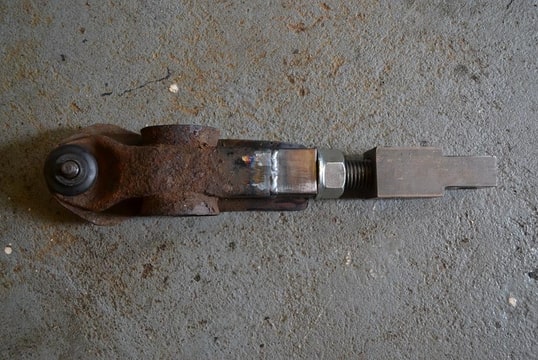
I cut out the rubber bushing out of the scrap piece control arm.I'm re using it,and put in my home made arm.
Than re alligne
And drive!!
Doing 4x100 swap the right way
To share some some info to you guys.
Here by a pictorial on how to swap to 4x100
On this site is already a tutorial on how to do it,BUT I dont like this one
viewtopic.php?t=12530
Why is it that i dont like this one,I'v done it.But took it of after riding it and realignment .
Due to the fact that you use the lower control arm and 2nd gen hub ,your wheel span wil change big,it will widen out a lott!!
Now you will not be able to put wider wheels on your car.Your positive camber is still there .So steering is BAD.
This is what i recomment,this is what I think is best.
You can give reply's if you think I am not right,I dont mind
What do you need:
1st gen knuckles
1st gen brake calipers
2nd gen disk brake
2nd gen hub(4x100)
Wheel bearing (1st or 2nd gen ,both will fit)
2nd gen 80/83 pinion or modify the 1st gen item(shown later)
This is what a 2nd gen hub looks like with dust seal of 1st gen on.
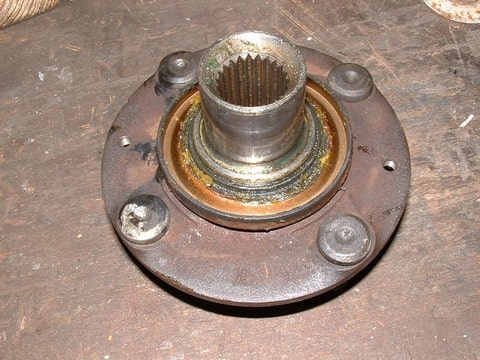
1st gen dust seal on 2nd gen hub
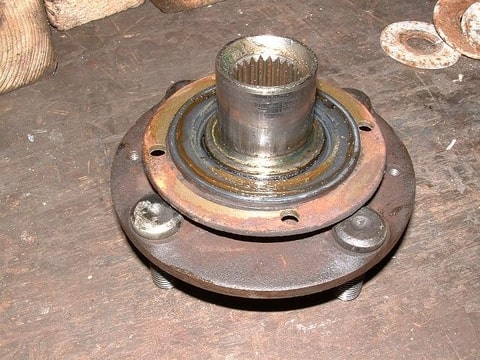
1st gen hub with 2nd gen seal and visa versa
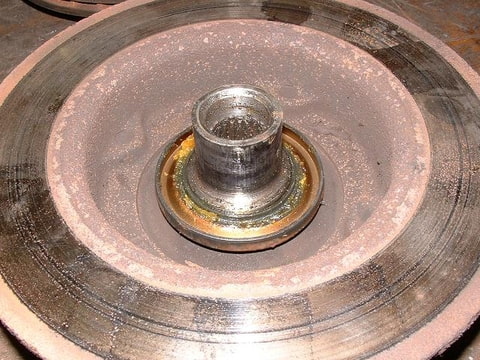
So now you know its fits!!
2nd gen knuckle and 1st gen knuckle
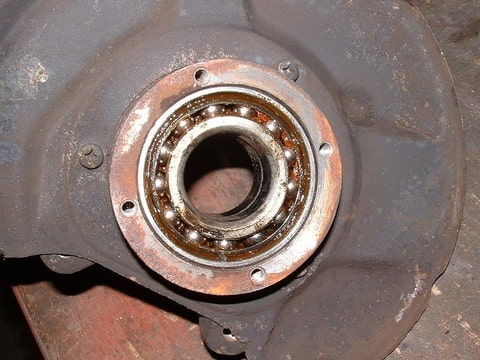
1st gen and 2nd gen bearings,both wil fit in 1st or 2nd gen knuckle!
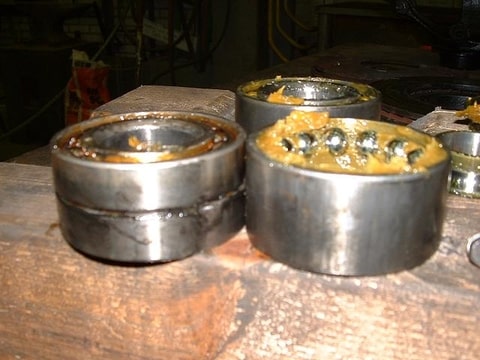
Now beforen pressing it all together ,you need to shorten the bolt heads of the dust seal.When the 1st gen hub is fitted on the knuckle you got clearance couse its 4x120,so more space.
The 2nd gen is 4x100,so 20mm less clearance.
Grind of the bold heads,that is the easy way
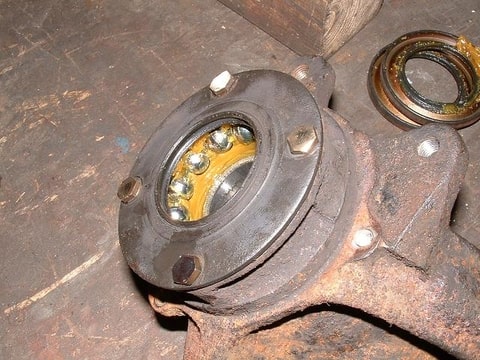
Than put it al together,2nd gen hub in 1st gen knuckle
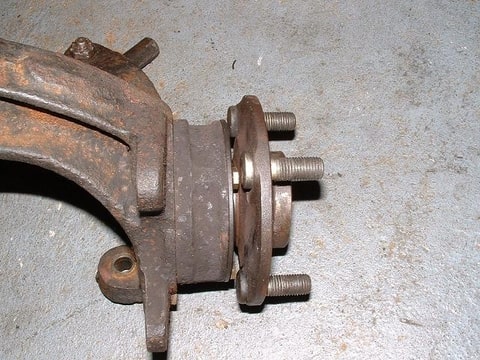
Than put 2nd gen disk brake on,and 1st gen brake calipers.
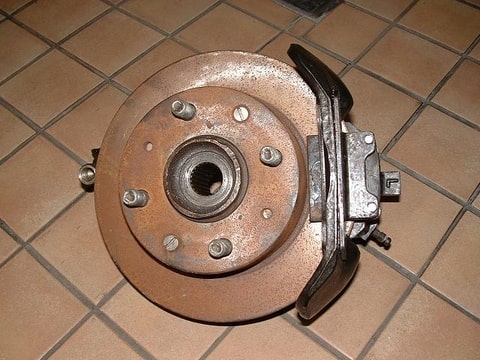
Now you are almost done
The pinion head of the 1st gen will not fit the hub,the splines run all the way on 2nd gen hubs,1st gens run 2/3 the way.
So you need to swap the pinion head to 2nd gen 80/83 on your axle.
I like it easy,1 just put my pinion my lathe,and made more room on the spline track.Just made it a bit deeper,so the splines of the hub wil slide further on de pinion head.
I even made the swap better:
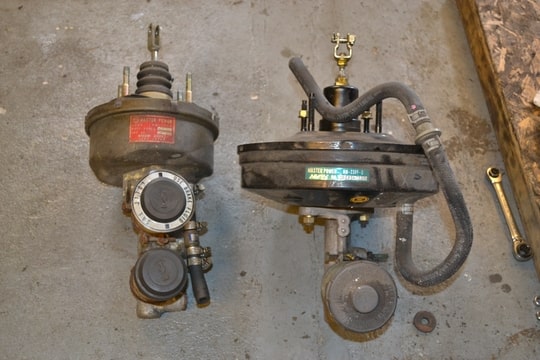
what i used
1st gen knuckles
2nd gen hub
2nd gen bearing
civic 92 brake booster and main cillinder
civic 92 vti brake calliper and disk
home made bracket
Last edited by mielko on October 9th, 2011, 5:41 am, edited 1 time in total.
- mielko
- Projects
- Posts: 336
- Joined: January 5th, 2010, 12:39 pm
- Province/State: Europe,holland
Small update
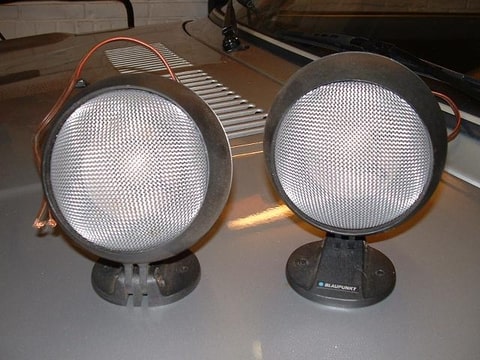
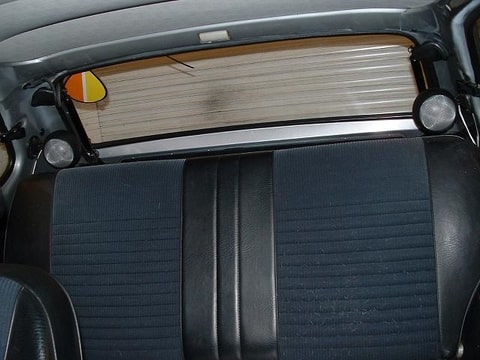
Finaly fitted my blaupunkt speakers wich i bought in a second hand shop for 3 Euro's
Happy to hear the mono radio in stereo now :D
One bad update :
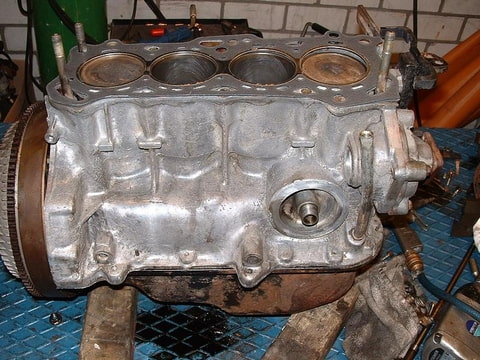
After 1500km my cooling tank started to flood,and eventualy started blowing.
Checked al easy things,thermostat,water pump,filler cap fan switch.Noop,all ok
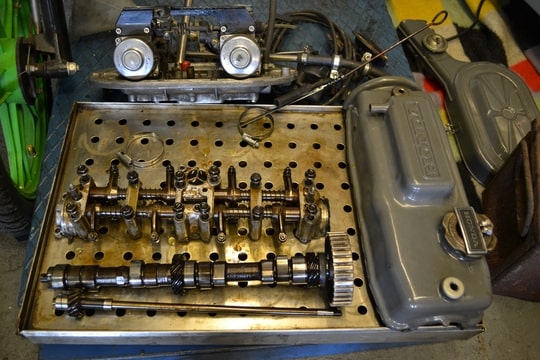
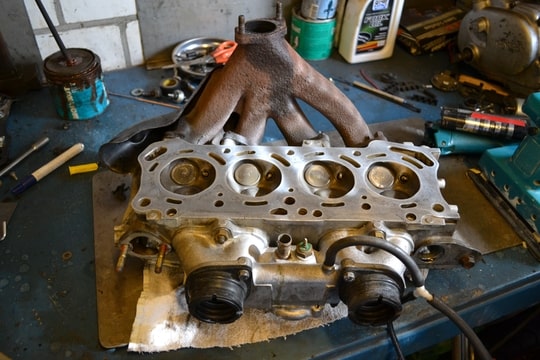
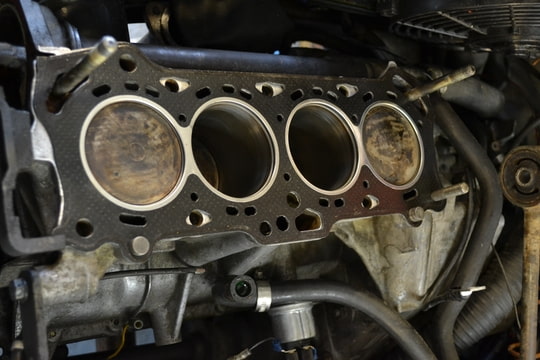
So pulled the head,did some measuring.Head is still flush.
I think it was the quality of the on line auctions gasket,the bore was bigger then the gasket i bought now.and the quality of the new one feels a lot better then the old one.
Tomorow is reasemble day,and hopefully it wil stay ok .
Finaly fitted my blaupunkt speakers wich i bought in a second hand shop for 3 Euro's
Happy to hear the mono radio in stereo now :D
One bad update :
After 1500km my cooling tank started to flood,and eventualy started blowing.
Checked al easy things,thermostat,water pump,filler cap fan switch.Noop,all ok
So pulled the head,did some measuring.Head is still flush.
I think it was the quality of the on line auctions gasket,the bore was bigger then the gasket i bought now.and the quality of the new one feels a lot better then the old one.
Tomorow is reasemble day,and hopefully it wil stay ok .