|
 |
|
 |
|
|
|
About Rust |
Rust
So we are all in this together, an all out war against rust,
is the eternal enemy and finding effective ways to eradicate
the evil annoyance is the Holy Grail of this crusade. So?.
What is Rust?
Rust, Corrosion, Metal Cancer, grot--rot or properly called
iron oxide. It's the stable form of steel. Iron ore, the raw
mineral we mine to make steel, is actually iron oxide. Rust!
Yes, steel is made from rust. It spends the rest of its life
trying to return to its natural state.
In order to have rusting take place, you need three things:
Steel, Oxygen, and Heat. Rust is actually an electron
exchange; Steel gives up an electron and becomes rust. It's
a process related to electricity. In fact, anywhere two
different metals touch, there is an electrical current
generated.
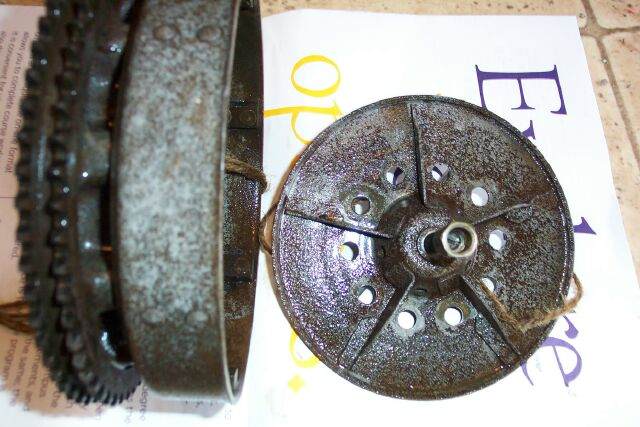
Where to look for rust
You don't have to look very far if your in the snow belt, if
you have made a trip to the scrap yard and you happen to
find one of these old butes chances are you found what I
did, not much, except some descent plastic parts and rubber
bits. If you are really lucky you might find some nice
preserved engine and transmission parts preserved in a thick
black coat of grease and oil.
The most likely areas to check for rust would be in and
around the wheel wells and on the windshield pillars, front
floor below the fuse box and stock speaker location. Under
the rear points where the front fenders bolt on and in the
front locations just behind the headlights to the sides.
Inner and outer rockers panels. These are the major war
zones where to look for the rust fungus. If you happen to
own a pre 78 I believe you will be in worse shape cause Honda
did not put inner liners for the front fenders and chances
are there are going to be some rot under there too. Can be
nasty, just ask Vulcan, he knows and he is fighting back.
If you are looking at purchase one of these gems use a
flashlight to look underneath the car behind the front and
rear tires on both sides, you may want to poke at the
undercoating for crispiness as it can be deceiving to the
eye Of course, before you do this make sure the of the car
says it's ok to go poking around & the car is parked on a
level surface in park/gear and the emergency brake engaged!
Shine your light on the inside of the fenders and wheel
wells.
Check for excess body filler, which from this side will look
like hardened putty all globbed up. In areas where you don't
have a clear view, use your fingers as your eyes and feel
around. Do you feel globs of hardened putty under there? If
so you're looking at a likely rust repair job.
Now you can use the sound test to decipher how far up body
the filler goes. Above the suspected area, tap lightly on
the car's body with your knuckles. You should hear a tinny
metal sound. Continue tapping and move slowly down to the
area in question. Does the sound change from tinny to solid
and dense? Where the sound changes is where the filler
starts.
Once you have detected a major rust repair job you may want
to stop your inspection and find a rust--free car from our
friends in the south or west coast because eventually the
rust will come bubbling back up through the paint. The car
may look great now, but if it looks like Swiss cheese in a
year, you'll be the crying loser in the end.
Another quick word to a buyer:
Avoid cars with fresh paint. Think about it. No one paints a
car just because the color has faded a little. It was
painted because it was either in an accident or it had a
rust problem or worse yet - both! A body man can hide a lot
of sin with paint and body filler. Be wary. However keep in
mind that these classics may have been paint up to 4 times
in its life span.
Other rust--prone places to check when buying, would be the
exterior flooring under the driver's and passenger's seats,
the interior flooring underneath the carpeting/matting,
under the matting in the trunk, and around the engine
compartment. Use your flashlight, your eyes and your
fingers! Be Careful Of Jagged Metal.
What to believe!
The way rust usually begins is through the chips and nicks
you receive from the pebbles and stones that pepper your car
through daily driving. With a small nick exposing bare metal
in an unnoticeable location, it's just a matter of time
until rust forms. Left unchecked long enough it will eat its
way through to the other side. When this happens you have
problems because once a rust hole starts it cannot be
stopped. It can only be slowed down or cut out. Cut it out
only when it becomes a cancer!
RUST IS CAUSED BY ROAD SALT!
"Top Ten" causes of rust in the snow belt, road salt would
barely make it to the middle of the list. (Road salt causes
what is known as "poultice rust", where salt traps and
retains water in a fixed spot for extended periods.)
In fact, the #1 cause of rust is condensation, the invisible
moisture that forms inside the car's panels due to
temperature changes.
If you leave your car parked outdoors, you will notice
condensation on the windshield first thing in the morning,
even in July. This daily "condensation cycle" creates water
which gravity then pulls to the lowest points inside your
car's sheet metal -bottoms of doors, lower trunk lid,
boxed--in fender areas, etc. Some experts call this the
"bathtub effect" -since the moisture has no place to escape
to, it stays in contact with the metal. In winter, the daily
temperature changes are much more extreme -especially if you
park inside a warm garage -so the effect is greatly
enhanced.
Additional rust problems arise in extreme cold when the
already--present water pockets expand (the same way ice
expands in your freezer) thereby rupturing the existing
factory sealants. "Electrolysis" is also an important issue,
because areas on the body with extra metals (as, for
example, where a door handle, trim piece, or mirror are
attached) generate more current, which in turn, accelerates
the rust process in that particular area.
NEW CARS DON'T RUST!
Put this in the "wishful thinking" category. Great strides
in corrosion resistance have been achieved at the factory
level, but new cars will start to rust from approximately
their third or fourth year onwards. The process is
complicated by the fact that rust works from the inside out
-the so--called "iceberg phenomenon,"-which suggests that,
by the time you actually see bubbling on the outer sheet
metal, it's really much too late.
MAKERS WARRANT CARS AGAINST RUST!
?Dream on? They warrant against rust "perforation" which is
really only the last stage of the entire rust process. By
the time rust perforates, the damage is fairly severe.
IF A CAR RUSTS, IT CAN BE EASILY REPAIRED:
More wishful thinking. Rust repair is like tooth decay -all
the bad metal must be excised and new metal inserted and
shaped. Not only is this very labor intensive, but the heat
used to weld the new metal makes the repair more vulnerable
to future rusting. Talk about a Catch--22! Most body shops
in these areas will give no warranty on rust work, while
some will offer a 1--year warranty if the owner insists.
The situation is made worse by the fact that many owners
decide to paint their older vehicles just prior to sale to
"mask" existing rust. Logic tells us that the quality of the
body job they select in this case would likely be the
cheapest and the fastest. And logic would be right!
HOW TO KEEP RUST FROM STARTING
The key to keeping a rust--free car is by stopping rust
before it can start. Or at at least address it before it
eats its way through to the other side. Because bare metal
will oxidize and painted surfaces won't, you only need to
protect your car from the elements to keep rust at bay. You
should maintain your car's body just like everything else.
This means a periodic checking of the most common areas
where rust might rear its ugly head.
Keep some touch--up paint on hand and periodically go over
your entire cars painted exterior with fine toothcomb. Look
for chips and nicks in the paint. If you find a chip where
surface rust has already weaseled its way in, use sand paper
(220 grade or finer) and carefully sand it down to bare
metal. Tiny nicks will be a challenge. Wrap the sand paper
around the tip of a small screwdriver and try not to mar the
surrounding painted surface.
Clean the dirt from the chips with a rag dampened with
mineral spirits and let dry. Using a touch--up brush, dab a
little paint on the nick, just enough to fill in the gap.
There's no need to coat the surrounding painted surface.
Otherwise it will just make your touch up more noticeable.
Do it right and your nick practically becomes invisible. If
you botch up your first try just wiping it off with your
dampened rag, let dry, and start over.
Periodical washing of your car's undercarriage is also a
good way to protect your car from corrosion. Spray the
underside of your car and inside the wheel wells too. A
build up of dirt @ sand can hold moisture against your car's
undercarriage and promote rust. Keeping it clean under there
will allow surfaces to dry quicker making it less
susceptible to oxidation.
It's also a good idea to inspect the underbody as well for
loose undercoating as the factory stuff has been on there
for over thirty years. Touch up any broken of bits and touch
up chipped floor boards with anti rust paint and the
re--touch the affected area with undercoating.
Rust Removal Methods
Lets see now, we have a few unheard of options from the
garage to Granny's Kitchen and a few trips to the laundry
room to boot.
Electrolysis, vinegar, Coke, molasses, muriatic acid,
sanding, wire brushing, grinding, sand blasting etc...
So we are into an all out war against rust, it is the
eternal enemy and finding effective ways to eradicate the
evil annoyance is the Holy Grail of this crusade.
So read on as I continue this confrontation head on into the
battle lines with rusty.
Most of the methods require some common sense and caution.
|
| |
|
Electrolysis |
Electrolysis
What is Electrolysis you ask?
Well Electrolysis is a method of removing hair permanently,
Sorry just kidding lol Or is it?
Electrolysis refers to the production of an
oxidation--reduction reaction
by means of a direct current.
It means that an electrical current (DC) can be applied to a
system in
order to force a reaction to occur. In this reaction, there
is an
oxidation of one species, and a reduction of another. Think
of it as
a battery operating in reverse.
Electrolysis
Basically, what we have here is a cheap, easy way to clean
off rust, and actually in some cases, paint, from our little
parts
What you need:
1. A large non--conductive container that will hold the
part in water - A Rubbermaid tub, a plastic bucket, or a
large non--metal trash can all work great as long as they
don't leak. Or for large projects a cardboard or wooden
form to be lined with plastic.
2. A
battery 6--10amp charger or other source of 12V DC power.
4.
Sacrificial electrodes - iron re--bar works great or a steel
plate, stainless steel is very bad (and the result is
illegal and dangerous).
5. Arm & Hammer Laundry Soda, also known as washing
soda.
6. Some
chains or steel wire to suspend the part in the solution -
copper wire is bad and messy.
7. Water
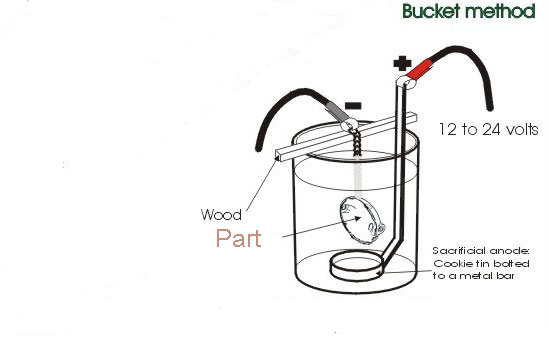
The basics are pretty simple.
1. Find a container big enough to hold your part, plus some
room to spare for the electrodes - they must not touch the
part for this to work.
2. Fill the container with water and add 1/3 to 1/2 cup
laundry soda per every 5 gallons of water. Mix thoroughly
3. Position the sacrificial electrodes around the edge of
the container and clamp them in place so that you have at
least 4" of electrode above the water to connect to. The
more the merrier - this is essentially a "line of sight"
process between the part and the electrodes.
4. Wire all of the electrodes together so they are,
electrically speaking, one big electrode. Make sure all
connections are on clean metal and sufficiently tight to
work
5. Suspend your part in the solution using the wire/chains
so it is not touching the bottom and is not touching any
electrodes. The part must be electrically connected to the
support mechanism and not connected to the electrodes for
this to work.
6. Attach the battery charger NEGATIVE lead to the part and
the POSITIVE lead to the electrodes. Do not get this
backwards! If you do, you'll use metal from your part to
de--rust your electrodes instead of the other way around
-the positive electrodes are sacrificial and will erode over
time. That's how the water becomes iron--rich.
7. Double check everything to be sure the right things are
touching, the wrong things are not touching, and the cables
are hooked up correctly.
8. Turn on the power - plug in the charger and turn it on.
Within seconds you should see a large volume of tiny bubbles
in the solution - these bubbles are oxygen and hydrogen
(very flammable!). The rust and gunk will bubble up to the
top and form a gunky layer there. More gunk will form on the
electrodes - after some amount of use, they will need to be
cleaned and/or replaced - the electrodes give up metal over
time. That's why re--bar is such a nice choice - it's cheap
and easy to get in pre--cut lengths.
The process is self--halting - when there is no more rust to
remove, the reaction stops. This is handy because you don't
have to monitor it, and because you can do large parts where
they are not totally submersed at one time without worrying
about "lines" in the final part.
Once you are done, the part should immediately be final
cleaned and painted - the part is very susceptible to
surface rust after being removed from the solution. There
will be a fine layer of black on the part that can be easily
removed, and once it is removed, the part can be
primed/painted as needed. Safety Precautions
You're playing with serious stuff here, so stay safe. It's
not rocket science, but if you're new to this, you might not
know all of this - so read up before you do any of this.
This process produces highly flammable and explosive
hydrogen gas (remember the Hindenburg?), so do it outside,
or in some other well ventilated area. Hydrogen is lighter
than air (like natural gas), so it will collect near the
ceiling - not sink to the floor like some other flammable
vapors will (like propane and gasoline). If you have open
flames near this (Hint: gas appliances like water heaters
and furnaces have pilot lights!) you will most likely
severely injure or kill yourself (and others near you) and
become a contender for the Darwin Awards in the process.
? Assuming you used re--bar and steel wire/chain like you
were told to, the waste water resulting from this is
iron--rich - it's perfectly safe to pour it out onto the
grass and your lawn will love it. Beware of ornamental
shrubs that don't like iron--rich soil though, unless you
like making your wife mad at you.
? Make sure the battery charger (or whatever source of power
you use) stays dry. All of the usual cautions about any
electrical device in a wet environment apply here.
? The solution is electrically "live" - it is a conductor in
this system. Turn off the power before making adjustments or
sticking your hands into the solution. You can get a mild
shock if you stick your hands into the water with the power
on.
? The solution is fairly alkaline and will irritate your
skin and eyes. Use gloves and eye protection. Immediately
wash off any part of your body the solution comes into
contact with with plenty of fresh water.
? Don't use stainless steel for the electrodes. The results
are toxic and illegal to dump out.
? Don't use copper for the electrodes and anything else in
the water - the results are messy.
If you are unsure of any of
this or unsure about your safety - STOP! Get help before you
do something stupid. Use common sense, be smart about what
you're doing, and stay safe so you can finish your
restoration project and enjoy it.
Why you
should not use stainless steel electrodes for electrolysis
Many people using the electrolysis method for rust reduction
swear by stainless steel, stating (incorrectly) that it's
not consumed, stays clean and seems safe.
Stainless steel is indeed consumed when used in the
electrolysis process, although slowly. The main problem with
using it is the hazardous waste it produces. Stainless steel
contains chromium. The electrodes, and thus the chromium is
consumed, and you end up with poisonous chromates in your
electrolyte. Dumping these on the ground or down the drain
is illegal. The compounds can cause severe skin problems and
ultimately, cancer. Hexavalent chromate is poisonous. These
compounds are not excused from hazardous waste regulations
where household wastes are.
These compounds are bad enough that government regulations
mandate "elimination of hexavalent chromate by 2007 for
corrosion protection."
Does your electrolyte turn yellow? That's a sign of
chromates.
If you have been using stainless steel for the anodes
(positive electrodes), wear rubber gloves when working with
or near the liquids. If you need to dispose of it, allow it
to evaporate into powders and dispose of the powders in
sealed containers during your local "hazardous waste
clean--up days".
Best bet - don't use stainless steel no matter how tempting
it is.
|
| |
|
Molasses |
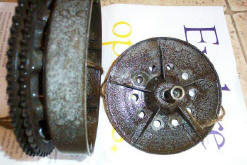
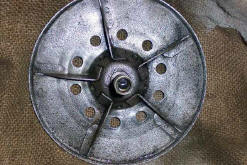
Sounds nuts, well I
thought so too, From the scary to the insane!
Well you have got to see this.
Materials required are two slices of bread well toasted one
side only please, a good thick slightly warmed up paste on
one side of the toast then smear away at the rusted body
panel.
Well, hell mine sounds just as crazy but not really when you
read and see the results.
Very important part about the Molasses part, Make sure you
buy the Molasses that doesn't say "Sulfur Free"
It works real well. Will not remove paint, but removes rust.
Mix about 5 parts water to 1 part molasses and submerge your
part for about 2 weeks. You can use a bucket, a kids size
swimming pool, or anything else big enough to hold your
parts.
If you want to experiment with this, try a small sample in a
coffee can or something. Get a bottle of molasses at the
grocery store, mix with water in an ice cream bucket. Find a
small, real rusty piece of sheet metal to experiment with.
It'd be best to suspend it in the can from a wire so all
parts get evenly soaked. Resist pulling it out everyday to
look at it. Pull it out in a couple weeks and hose it off.
You might want to keep the bucket outside, though, as it
will smell
Here is a story I found on a blog about this method
I had a tip a while back about rust removal...put it in a
molasses and water mixture, and VOILA, no rust. I didn't
believe it. Well, somebody I really respect finally
recommended it to me, for a stubborn rust problem, and I
tried it. He recommended mixing 1 part molasses to 12 parts
water. I also heard 1 LB molasses to gallon of water, and
1:20 ratio, although weight or volume was not specified. I
used my calibrated eyeball to mix up the solution, and put a
very rusty WWII tail light door, a cast iron oil pump with
nickel plating, and a forged steel piece in the same bath,
and watched it every day. The first day, most of the rust on
the tail light door was GONE! The casting was losing rust,
and the forging had noticeable reduction of rust. It
continued to improve each day. After two weeks, the tail
light is almost whistle clean. The casting is the same, and
the plating was not touched. The forging is still resistant,
and has a little left in the shallow cast pits on the
surface. All of the painted surfaces are untouched. I am
really amazed by the progress. I don't know what the process
is, and don't know how it will continue to work, but $2.29
of Grandma's Molasses and .00001 cents of Baltimore City Tap
Water are really doing a better job than a glass beader.
Tomorrow, I am going to the feed store, to buy 50 Lbs of
Feed grade Molasses for $18.54, and am looking forward to
saving on the sand blasting bill this spring (Oh boy, an
ambulance, an MB, a carryall, and a motorcycle- any little
bit helps) Has anybody else used this technique? Any tips on
technique, other than pour, wait, and wash?
And they laughed at me when I told them about it twelve
months ago, if you really want to know what causes it,
Phosphoric Acid, (excuse the spelling), is created in the
mix, a better solution is 10:1 ratio. The mix will lose it
strength after awhile (about 8--12 months), but it's good
value for money.
Now are you hyped up, ok here is the pudding in the proof.


 |
| |
|
Coke |
Rust Removal Using - Soda Pop?
I am sure you have all heard this one before but has anyone
tried it?
many carbonated beverages will remove rust. This is because
the gas used, carbon dioxide when mixed with water, makes
carbonic acid. To make rust, the iron oxidizes - it combines
with oxygen. This is why rust is also called iron oxide. The
carbonic acid reverses this reaction - this reversal is
called "reduction." Here's a better reason - take a look at
your Coke can - it has phosphoric acid as an ingredient.
Phosphoric acid is the basis of Naval Jelly, a commercial
product used for rust removal. Phosphoric acid dissolves
iron oxide very quickly while etching metallic iron very
slowly so you can leave metal in phosphoric acid with little
damage.
The downside is that all acids contribute some hydrogen to
the metal structure, weakening the steel by hydrogen
embrittlement - so always use only as much time as is
absolutely necessary to remove the rust. An advantage of
phosphoric acid is that it leaves a fine protective coating
of iron phosphate. Because this coating is not thick or
durable some protection is still required. Years ago
supposedly Volkswagen use a process of phosphating metal
prior to painting as it provided a chemical protection
against rust under the paint layer.
So, spilling your Coke into your old engine wouldn't really
be a bad thing if you were trying to remove some rust. |
| |
|
Ultra One |
Here is a product
that I think is amazing and seems to be non--toxi.
Take the time to read through the before and after, the
results are impressive and very quick too.
Ultra One Corporation
Edgewater Industrial Park
112 East Ave., Unit 8
Hackettstown, NJ 07840
Tel: 908--684--5444
Fax: 908--684--5455 |
| |
|
|
|
|
|
 |
|
 |
|
|