|
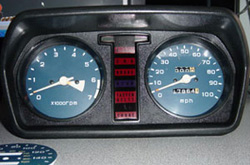
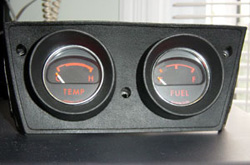
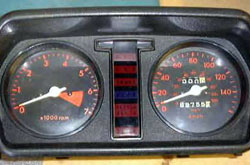
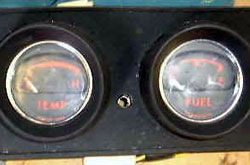
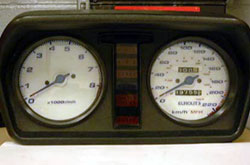
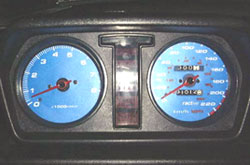
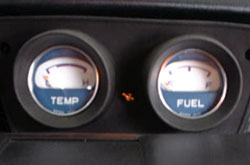
CVCC Gauges
CVCC deluxe gauge clusters can be swapped very easily into any 1200. The deluxe gauges are
a two pod setup- tachometer and speedometer mount behind the steering wheel in one pod and fuel and
temp gauges mount on the dash behind the astray in another.
|
|
|
|
|
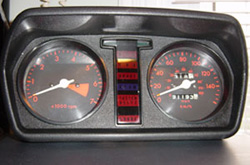
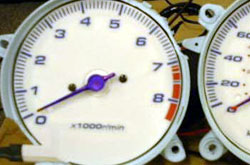
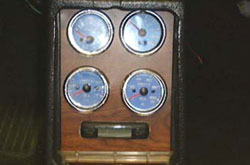
Special X gauges:
|
|
|
These are identical to the CVCC gauges except the marks and
numbers are all red and the back plate is black.
|
|
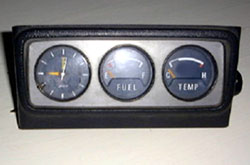
JDM 3 pod auxiliary
cluster
|
|
|
This of
course are an option we never received on this side of the water.. too bad, I like the
clock! (Japan Only
|
|
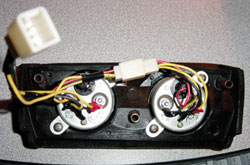
Mounting/Wiring
Main Cluster Speedo/Fuel/Temp Removal
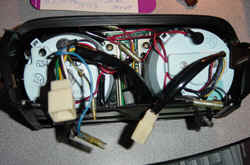 The main instrument pod
(tachometer + speedometer) has 3
10mm nuts that hold it in. Two of them are sort of behind the steering
column, facing the firewall. Feel around for them and you will find them.
The third one is also facing the firewall, directly behind where the
tachometer is. Once you get the nuts out you can pull it out just enough to remove
the cable from the back of the instrument housing. when you have the cable
removed, you can pull it out and have plenty of room to work with the
wires. To take the gauges out, first remove the mounting bracket from the
bottom of the housing. Keep in mind that the housings are fragile, and any
any mount of pulling on it will break the screw tabs that hold it to the
bracket. I have not found a pod yet that doesn't have broken mounting
tabs, but it doesn't really affect the instrument pod that much. The main instrument pod
(tachometer + speedometer) has 3
10mm nuts that hold it in. Two of them are sort of behind the steering
column, facing the firewall. Feel around for them and you will find them.
The third one is also facing the firewall, directly behind where the
tachometer is. Once you get the nuts out you can pull it out just enough to remove
the cable from the back of the instrument housing. when you have the cable
removed, you can pull it out and have plenty of room to work with the
wires. To take the gauges out, first remove the mounting bracket from the
bottom of the housing. Keep in mind that the housings are fragile, and any
any mount of pulling on it will break the screw tabs that hold it to the
bracket. I have not found a pod yet that doesn't have broken mounting
tabs, but it doesn't really affect the instrument pod that much.
To hook up the tachometer you will also have to
put the unattached blue wire on to the negative post of the ignition coil. The blue wire is the tachometer signal wire. Look at the
wires around your coil, it won't be attached and will probably be wrapped up in the loom.
You should find a blue wire with a "bullet" connector somewhere around there. On
cars that had the tachometers stock, the other half of that connector has a short lead that
connects to the coil. I believe the yellow wire is power.
|
|
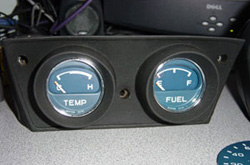
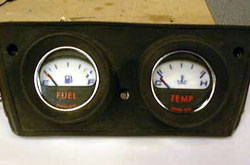
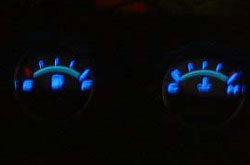
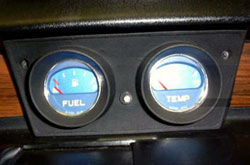
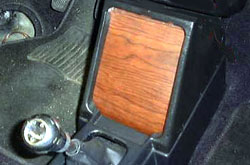
Temperature/Fuel Cluster
Installation
 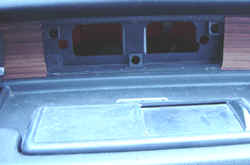 If you want to keep the wood grain sticker on the dash I recommend this- If you want to keep the wood grain sticker on the dash I recommend this-
Drill a ¼" hole directly behind the ashtray and about half way up the
wood grain.
Insert a 90’ degree pick (or something equivalent) in the hole and pull gently on the
filler panel. You’ll notice a bulge in the wood grain sticker. Use an Exact-O knife to
cut around the bulge.
If you don’t care about the wood grain look and will be replacing it simply
tear it off. You can replace it with a piece of 1/8" thick Plexiglas in any color
you like, or you can simply cover that Plexiglas with a piece of material of your
choice. Use 3M double sided tape or spray glue to hold it to the dash.
Now if you have the mounting gear for the gauges- the pod screws and plastic inserts,
remove that plastic panel and screw your cluster in. If not keep the panel and mount your
gauges in front of that plastic panel
The wiring is located behind the Tach/speedo housing,
you just need to pull it over to
center and plug it in.
The red and black wire (power from dimmer), and the black
wire (ground) are instrument
lights. All these dashboards have a removable panel behind the wood grain. Once you remove
the panel you'll see three SQUARE spots that require plastic inserts that the pod screws
go into (you did get them from the donor, right?) Justin's' way is perfect if you don't
have them and don't want to buy them.
|
|
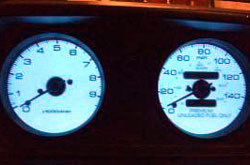
White Gauges: By
Justin
Use the factory pods and original gauges with aftermarket faces, in particular the '94
and up Integra LS, they are the same diameter as the factory ones, though the scale is
slightly off, you get used to it! They are the reverse Indiglo style.
Twyla's convertible has the same brand
(Eurolite) in Carbon Blue Indiglo and she also
matching Boost/Oil Temp/Oil Pressure/Voltage all in 2"(they are mounted in the
optional center console)
|
|
|
|
Example of before picture
|
|
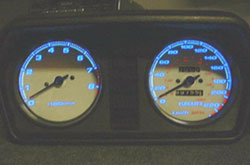
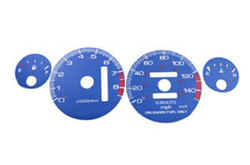
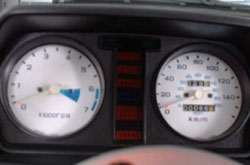
New For Justin's wagon
Indiglo gauges originally designed for the 93' and up Integra GSR, they are the same
diameter as the originals, the tachometer is off (it reads 9k when your only doing 7K)the speedometer
is a direct replacement for Canadian gauges (60KM/H =60MPH, 140KM/H=140MPH) So if you just
look past the MPH sign you actually doing that in KM/H ..the temp and fuel gauges are off
by about a 1/8 at the extreme empty and full spots, so 1/8-1/4 is empty and 3/4 to 7/8 is
full.
|
|
|

|

|
|
|
|
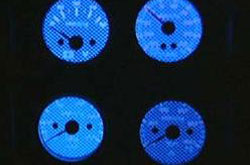
Lights off
|
|
|
Lights On
|
|
Cher's Civic
The Indiglo gauges are for the '94 and up
Integra LS, they come in either blue or green.
|
|
|
|
Lights On
|
|
Twyla's convertible
EuroLite Indiglo Style Gauge 94-99 Integra
|
|
|
|
|
|
|
|

|
|
Floor Console
|
|
|
|
|
|
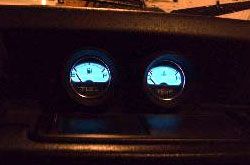
Kurt's Custom Gauges
Start by
disassembling the original gauges and carefully removing the needles. Make
a note of where the needles sat at '0' because they usually sit just a
little below the '0' on the gauge face. This is important for accuracy
when they are reassembled.
The gauge faces were then scanned and uploaded to Photoshop. I tried using
Paint through Windows but its not advanced enough - stick with Photoshop.
The image of the gauge faces then have to be shrunk down to size so they
are exactly the same size as the stock blue ones. For some reason the
scanners never seem to scan them to the exact size. Have tons of paper in
your printer to print off some samples until you get them right.
Once the size is correct then go into the tools menu in your photo program
and 'reverse' the colour. The dark blue face will turn out white (or clear
when printed), the numbers black and the red will turn blue. If your faces
had some blemishes on them when they were scanned this will turn up as
well but can be fixed up or removed by using the 'edit image' option in
the Photo program.
Once you are happy with the image they can be printed out on ordinary
paper to make sure they turned out right.
Now your ready to print off the faces. I chose to use 'inkjet friendly'
clear overhead projector plastic sheets. This is important because if you
try using regular clear sheets the ink will just run off. These can be
bought at any stationary store such as Staples or Office Depot. Once these
are printed just cut the gauge faces out.
Now you need the white backgrounds. You could do the whole thing on white
card stock but the light will not shine through. I ended buying white
presentation binders from Office Depot and using the white vinyl from
those. The vinyl is clean enough for a clean white background but is thin
enough for light to evenly penetrate it. All you have to do with these is
trace them out and cut them the same size as the gauge faces.
Using a sharp exacta knife cut out the slots for the trip, odometer,
needle hole and screw holes in the clear overhead sheet and the white
vinyl. The places to cut are easy to find as they will show up when you
scanned the faces.
Now place the clear gauge faces you printed off on top of the white vinyl.
You can use contact cement to attach the two together by gluing just the
edges (gluing anywhere else will show the glue) or using thin strips of
scotch tape around the outer edge. If you stick to the edges you will not
be able to see the tape once they are assembled. I went with the tape
To try and hide some of the hardware (gears, cogs etc.) behind the
speedometer and tachometer I cut out some circles out of thick card stock
to place behind the vinyl so that light would not penetrate this area. You
don't have to do anything with temp and fuel gauges.
Now put the gauges back together and enjoy. You may have to play with them
a few times to make sure everything sits flush. |
|
|
|
|
|
I ended up
using thin white vinyl sheeting for my gauge background to obtain a clear
look when the light shines through. I then cut out some circles with
thicker card stock to block the hardware behind the face. I am still using
the stock bulbs but with the white vinyl and it gives it an appearance
similar to the Indiglo gauges only its not as bright.
|
