 |
 |
 |
 |
 |
|
Engine Swaps |
|
Increasing the output -To swap or not to swap? by bojangles
|
Our thanks to Charles Hatcher for contributing the following article:
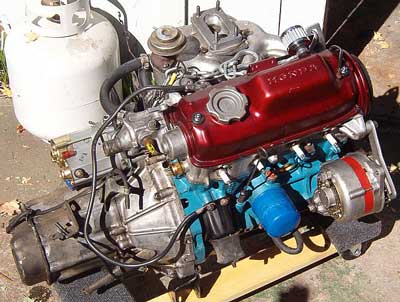 If you own a first generation civic and require more power an engine swap is the easiest method. The quickest and dirtiest method is to drop an accord or prelude motor of the same series i.e. E prefix; an EK 1800 motor works well (Japanese import) this has an iron block and makes the nose a little heavy. ER TURBO from Japan is the pick of the bunch. The ER is a CVCC motor and only a 1200, it is fuel injected and puts out about 100bhp standard. If you remove the restrictive Catalytic converter (must be removed any way for fitting) a less restrictive pipe will allow the engine to breathe more easily and you will get approximately 14psi of boost standard. If you wish to fit the series 2 ER turbo you have to modify the plenum chamber as it is a little tall. Another good conversion is ES/ET (1800/2000). This requires a few mounting modifications but gives you awesome throttle response (twin
carburetor) and a very strong motor and 5speed (huge input shaft) which wont break. Alternatively you can do up a 1200 to give 100-120 easy hp by using an EB 2 block, EN crank, rods and pistons, bore it out about 10thou, shave the head. This motor is now almost a 1500 within the 1200 block. Use the cross flow EB2 head, get the twin
carburetors released on the civic RS (Japanese import) and while your at it fit the factory twin pipe extractors (run the primaries for about 1m before collecting into a 2 inch pipe). Also get hold of the standard civic RS 5Sp gearbox if you can this is a close ratio box (designated GB-) or the Next generation 5sp
(GN) box. Make sure you get the motor balanced and your distributor advance curve altered a bit. This will give awesome revs, great power and it all looks totally stock under the bonnet.
|
|
Errol's' build theory
|
|
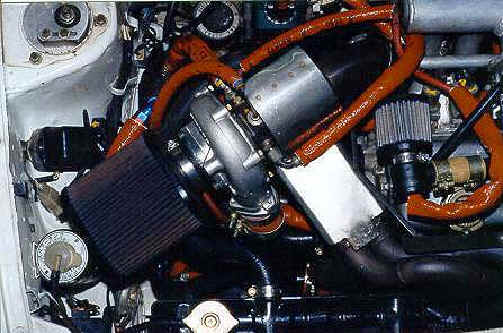 The early civics (really all Hondas had a overheating problem's) with the thermo sensors going bad in the radiator or (even the thermostat) head and the fan doesn't come on and you overheat (crack or warp a head) or blow a head gasket. Now depending on your time and money, if you have both! and another car to drive) pull the engine and transmission (if you live in "the city" and don't need a fifth gear, keep the 4spd. otherwise get a five speed from a 80 civic 1300 that shows a GJxxxxxxx on the serial number 'tape' down by the shifter cable bracket) Try to find a early 80's 1300 engine for the rotating assembly (crank/rods/flywheel) have a 'good' machine shop to bore/hone the block for oversize pistons and pressure check the head for cracks. If good, have them pocket port and 'deck' it and a good 3 angle valve job. Get a NEW cam (and check the rockers for bad wear, replace) or have yours reground to the specs you need-- (another thread) don't forget to get new rod bolts also!......Take time and put it all together slow checking and cleaning everything and put the drive train back in. Try and find a Weber
carburetor (32/36) and adapt it to the stock intake. Check the distributor and get a CRANE XR 700 universal electronic ignition from JC Whitney and replace the points check the vacuum advance can on the distributor, get the timing right and see if it starts!....NO it's not that easy! That's just the engine! and I'm running out of room. You can email me for more confusion if you want. Expect to pay around 700-1000.00 (DON'T CHEAT YOUR SELF ON CRAP PARTS, if done well it's
going to run for another 20 something years!) Now watch, here they come! The early civics (really all Hondas had a overheating problem's) with the thermo sensors going bad in the radiator or (even the thermostat) head and the fan doesn't come on and you overheat (crack or warp a head) or blow a head gasket. Now depending on your time and money, if you have both! and another car to drive) pull the engine and transmission (if you live in "the city" and don't need a fifth gear, keep the 4spd. otherwise get a five speed from a 80 civic 1300 that shows a GJxxxxxxx on the serial number 'tape' down by the shifter cable bracket) Try to find a early 80's 1300 engine for the rotating assembly (crank/rods/flywheel) have a 'good' machine shop to bore/hone the block for oversize pistons and pressure check the head for cracks. If good, have them pocket port and 'deck' it and a good 3 angle valve job. Get a NEW cam (and check the rockers for bad wear, replace) or have yours reground to the specs you need-- (another thread) don't forget to get new rod bolts also!......Take time and put it all together slow checking and cleaning everything and put the drive train back in. Try and find a Weber
carburetor (32/36) and adapt it to the stock intake. Check the distributor and get a CRANE XR 700 universal electronic ignition from JC Whitney and replace the points check the vacuum advance can on the distributor, get the timing right and see if it starts!....NO it's not that easy! That's just the engine! and I'm running out of room. You can email me for more confusion if you want. Expect to pay around 700-1000.00 (DON'T CHEAT YOUR SELF ON CRAP PARTS, if done well it's
going to run for another 20 something years!) Now watch, here they come!
I would use a Pertronix igniter to replace the points with, 69.95 from Summit and never change points again.
|
|
The Idiot's guide to motor swaps! Justin
|
|
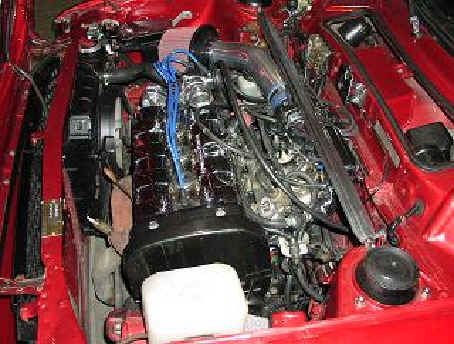 Okay here's the low down.. Okay here's the low down..
For the civic 1200 chassis, the easiest swap is the D series single cam
motors.
You can go with pretty much any year. The most desirable would be to go
with a '92-'95 D16Z6 mated to a '88-'91 civic transmission( you go with
this transmission due to the fact that it's cable and not Hydraulic like
the '92-'95)
1. Strip the
engine bay of all parts (I.E.: Engine/transmission wiring
harness ,brake booster/master cylinder etc etc)
2. I start off by removing
the cross member/sway bars/tie rods.
3. I then proceed to trim and shave the battery tray, the pinch moulding
below the hood latch, the front upper radiator support.
4. Next step is to bring the motor and transmission in and test
fit to see where the inner frame rails need to be shaved/massaged.
(see
pictures of Peter's Hybrid)
5. I then proceed to build
the new mounting plates to support the motor. (I always start with
the driver's side and then the transmission mount)
6. Shave the lower lip of the steering
box in order to clear the transmission shifter assembly.
7. Place motor in the engine bay and double check that the motor is
sitting level, and that both axles will work properly.
8. Weld in both mounts.
9. The front cross member is next!! Place the cross member back on the
car, you will have to trim the lip in order to clear the oil pan and
transmission. The front mount is next. basically weld two plates to the
front cross member and bolt on the mount.
10. Depending on what exhaust manifold you go with depends on what cross member
modifications have to be done. I have cut the whole section out of the cross member
and re-enforced it. another one had a stock exhaust manifold from a '96
civic (the ones with the cat built right at the top) we cut the cat off,
and ran a custom 2 1/4 pipe right off the manifold and brought it out
between the cross member and the front valance. On Peter's we built a
custom cross member to run a 4-2-1 Mugen header.
11. The Oil pan  if you go with a stock cross member
you will either have to make some custom tie rod ends, or cut the corner
off the oil pan. (I will post pictures of a modified oil pan) if you go with a stock cross member
you will either have to make some custom tie rod ends, or cut the corner
off the oil pan. (I will post pictures of a modified oil pan)
14. All depending on skill, the stock radiator can be used, or a Volkswagen
2 core with
external filler. You will have to build custom mounts for either set-up.
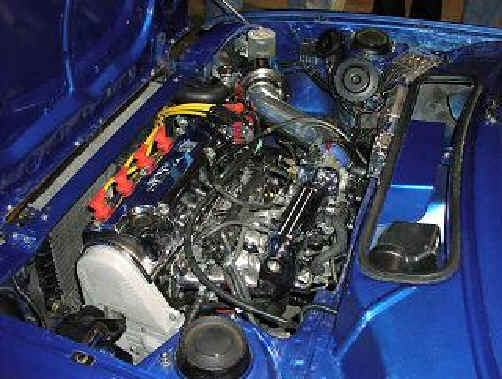 13. You will need to run a new fuel line/ change all the hoses at the tank
to high pressure injection line/ add a fuel injected pump ( I found the
'88 Ford F series inline pump works great : ) 13. You will need to run a new fuel line/ change all the hoses at the tank
to high pressure injection line/ add a fuel injected pump ( I found the
'88 Ford F series inline pump works great : )
14. You will have to build a complete wiring harness for the EFI swap.
15. More to come...
You will retain your factory axles with the swap. You will need a portion
of the shifter assembly (the stabilizer bar and rod) and
then you will have to cut and shorten your stock assembly and weld it
together.
|
|
D or B series swaps "D"
|
|
I'm putting in a D16A6 right now and might be able to give some advice. I mounted the fuel pump right under the rear driver's side corner of the car. Use the original gas feed line as your tank return line. Plumb a new line (1/4" should be fine) right along side of the original line and use this as the new feed line. Oh, and put a fuel filter between the tank and the pump.
Yes, an in-tank pump would be best. I've had to adapt between fuel lines and a few other hassles involved with using an external pump. If I did it again I'd seriously consider an in-tank pump. Yeah, I'm thinking about boosting it too, so I've actually gone with 5/16" feed line. Oh, and that fuel rail stock isn't really expensive - good idea. I'll try to get some
pictures of the swap soon.
|
|
Honda Civic Engine Swap
|
|
By Charles Hatcher
If you own a first generation Civic and require more power an engine swap is the
easiest method. The quickest and dirtiest method is to drop an Accord or Prelude motor of
the same series i.e. E prefix; an EK 1800 motor works well (Japanese import) this has an iron
block and makes the nose a little heavy. ER TURBO from Japan is the pick of the bunch. The
ER is a CVCC motor and only a 1200, it is fuel injected and puts out about 100bhp
standard. If you remove the restrictive catalytic converter (must be removed any way for
fitting) a less restrictive pipe will allow the engine to breathe more easily and you will
get approximately 14psi of boost standard. If you wish to fit the series 2 ER turbo you
have to modify the plenum chamber as it is a little tall. Another good conversion is
ES/ET (1800/2000). This requires a few mounting modifications but gives you awesome throttle
response (twin carburetor) and a very strong motor and 5speed (huge input shaft) which wont
break. Alternatively you can do up a 1200 to give 100-120 easy hp by using an EB2 block,
EN crank, rods and pistons, bore it out about 10thou, shave the head. This motor is now
almost a 1500 within the 1200 block. Use the cross flow EB2 head, get the twin carburetors
released on the Civic RS (Japanese import) and while your at it fit the factory twin pipe
extractors (run the primaries for about 1m before collecting into a 2 inch pipe). Also get
hold of the standard Civic RS 5-Speed gearbox if you can this is a close ratio box (designated
GB-) or the next generation 5-speed (GN) box. Make sure you get the motor balanced and your
distributor advance curve altered a bit. This will give awesome revs, great power and it
all looks totally stock under the bonnet.
Credit Charles Hatcher
1978 1200 Civic By synlube4u@aol.com
Not 'really' difficult. sure you have to make new mounts and maybe shorten the axles...
but if Justin can do it ANY one can. (ONLY kidding) And if you can do a search, He put
a 87 CRX motor, 1g Integra motor, and a V-tech motor in a 1st generation
Civic!
If you're not looking for Big horse power, a 90-91 CRX SI ('cause they're small) can be
built to about 150hp without too many modifications. Just lots of wiring!
Really... His turned out gorgeous!
|
|
EN1, EK1,City Turbo Engine Swap
|
|
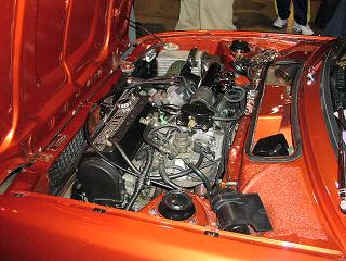 Best Bang for buck is the City Turbo will give you the most reward. To get 110 nice street drivable hp from your EB is not easy and will cost a lot of money. It is possible to get 100-160 hp from an EB but the drivability really suffers. If you drop an ER turbo into your car even with everything else standard including the exhaust, you will get 110hp stock and 50mpg and a smoother idle than you could ever achieve with an
EB. 150hp is easily achievable through
subtle add on breathing modifications and tuning. Best of all it is all factory Honda gear with factory Honda reliability.
The City Turbo does require the addition of a bigger fuel line (leave the rest there as you need them as well), a surge tank of some sort (either in-tank or stand alone with a primer pump and an EFI pump. You only need to modify one mount (the torsion or torque rod). All the civic axles pop right in as does the gear linkage etc.
Wiring needs to be heavily modified with an almost complete swap to the
City Turbo wiring loom. Or a hybridizations of the Civic loom and City loom (a little more complicated). Do not buy the ECU and engine and expect to get it running. You need to get all the additional loom, sensors, idle up controller, five pin resistor pack, alternator, map sensors and the list goes on.
If you want the city turbo make sure the package is complete and that you can check everything of the list. Otherwise buy a half cut.
---
VL turbo fuel pump $250 (NEW)
Fuel lines (1/2 inch) $12 + $12 for a pipe bender
Torque rod (use 1/2 stock civic and 1/2 EN/ER) weld together $10
Air filter up to $200 for decent ram pod, $50 for plumbing at exhaust shop
Turbo dump pipe, laser cut flange, two mandrel bends to 2.5 inch piping, $250-300 (expensive), I have a second hand one for sale cheap because I have fitted a different type of turbo.
Internal surge tank and large fuel outlet ($70) at radiator repair shop.
--
Justin- I cross-referenced the pump that came with my city turbo and it's the same part number found on '86-'87 Integra
|
|
City Turbo Conversion For a First Generation Civic
|
|
Written by Trevor from CityTurbo.com
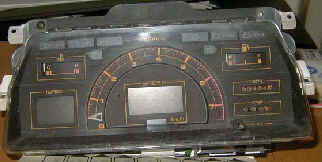 There are many different conversions for the civic. Some include worked 1200’s, 1600’s, 1800’s and sometimes even 2ltr’s. All these are great but sometimes they take away the drivability and fuel consumption that you become accustom to with the civic. The city turbo conversion in most circumstances increases
drivability and gets better fuel consumption than the original 1200 (unless your driving around under boost for a long period of time).
The first hurdle you must come across is sourcing an engine. These engines are starting to get harder and harder to find as time goes on due to its popularity. I managed to find mine from a Jap Importer in Sydney and it was just a matter of calling everywhere in the yellow pages until I found one. If possible try and obtain the whole front cut not just the motor, as this will really help down the track. If I knew then what I do now I would have definitely done this.
Before you pull anything apart mark or write down where everything goes.
E.G.. Make a note of all the vacuum lines and try not to mix any up. Get a good idea of how the wiring is laid out and even take notes. ETC.
The City Turbo has the exhaust manifold on the backside of the motor compared to the civic, which has the exhaust manifold coming out the front. Its almost like its been turned around. To accommodate this you will need to shorten the top engine mount but this is the only major mod that is needed.
The series 1 city turbo has a more civic friendly inlet manifold. This will need no modification to fit. On the other hand the series 2 has a taller inlet and will need some modification to fit. My civic has a series 2 so I had to cut a hole in the bonnet and cover it with a little bonnet hump, I have also raised the bonnet a couple of cm’s so there is enough clearance for the intercooler pipes. I am probably going to change this to a little bonnet scoop for extra airflow anyway. You can avoid this by finding someone that does
aluminium welding and just shortening it, or sourcing yourself a series 1 inlet.
Once the motor is in I notice that sometimes the standard cat converter rubs up slightly against the back of the engine bay, as it comes straight off the turbo. This can make a very annoying rattle and also comes very close to the
driveshaft. If you try and bend this or move it to much it puts a lot of strain on the back of the turbo housing and can cause damage (as I found out). As the standard cat is a piece of junk anyway the best thing to do is just to fit a big dump pipe off the turbo and run a high flow cat under the car. This gives you a good power increase as well.
There are quite a few different places to fit an intercooler. The most obvious place is next to the radiator behind the grill, but the spark plug leads and alternator can cause some problems if the intercooler is to big. It would be best to use right angle spark plug leads to give you more room. Another option would be to relocate the battery inside the car and use this space for a water to air intercooler or an air to air intercooler but you have to be careful that its getting cold air from somewhere (i.e.. bonnet vent). I have put my intercooler out the front of the car, in front of the grill but behind the bumper. There is a long sheet of metal that the indicators sit on which can be cut to allow a lot of room for the intercooler. The problem with this is that there is no hiding that it is a turbo and it tends to get a little hammered by rocks from other cars.
Plumbing the intercooler is the same for every spot, just make up some sort of template and get your local exhaust shop to make up the pipes to suit, or just get some mandrel bends and do it yourself. I recommend fitting up an intercooler as it makes a noticeable increase in power.
|
|
Upgrading City Turbo
|
|
Any intercooler is better than nothing, provided it has air flowing through it. I run a smallish Japanese intercooler on my T1 and get intake temperatures of about 10-15degrees above ambient.
Why do you want a bigger turbo? The standard one is capable of supporting big power increases, the amount of work involved to convert to a larger one just isn't worth it unless you have the time, money and big power goals.
|
|
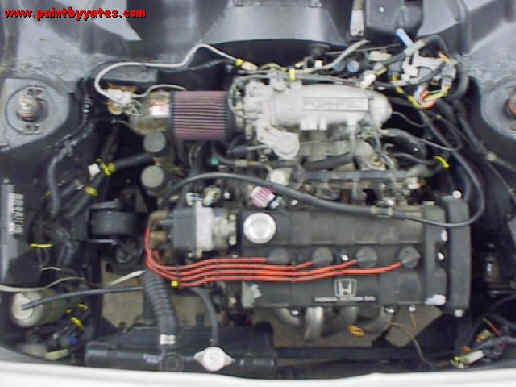
SB1B16
Carb
|
|
|
|
|
|
|
 |
 |
 |
 |
|
 |

